Transferra Guide: How to Use Payment Templates and Approval Workflow
Streamline your payments on the Transferra platform with reusable templates and a secure approval workflow. Learn how to save time, assign roles, and manage funds in just a few steps.
Efficient financial management is crucial for businesses of all sizes. To help streamline your payment processes and enhance financial control, we’ve introduced two useful tools: Payment Templates and For Approval workflow. In this guide, you’ll find step-by-step instructions to use these features effectively.
Creating a Payment Template
Payment Templates save you valuable time by enabling you to quickly initiate recurring payments without repeatedly entering the same information.
Follow these simple steps:
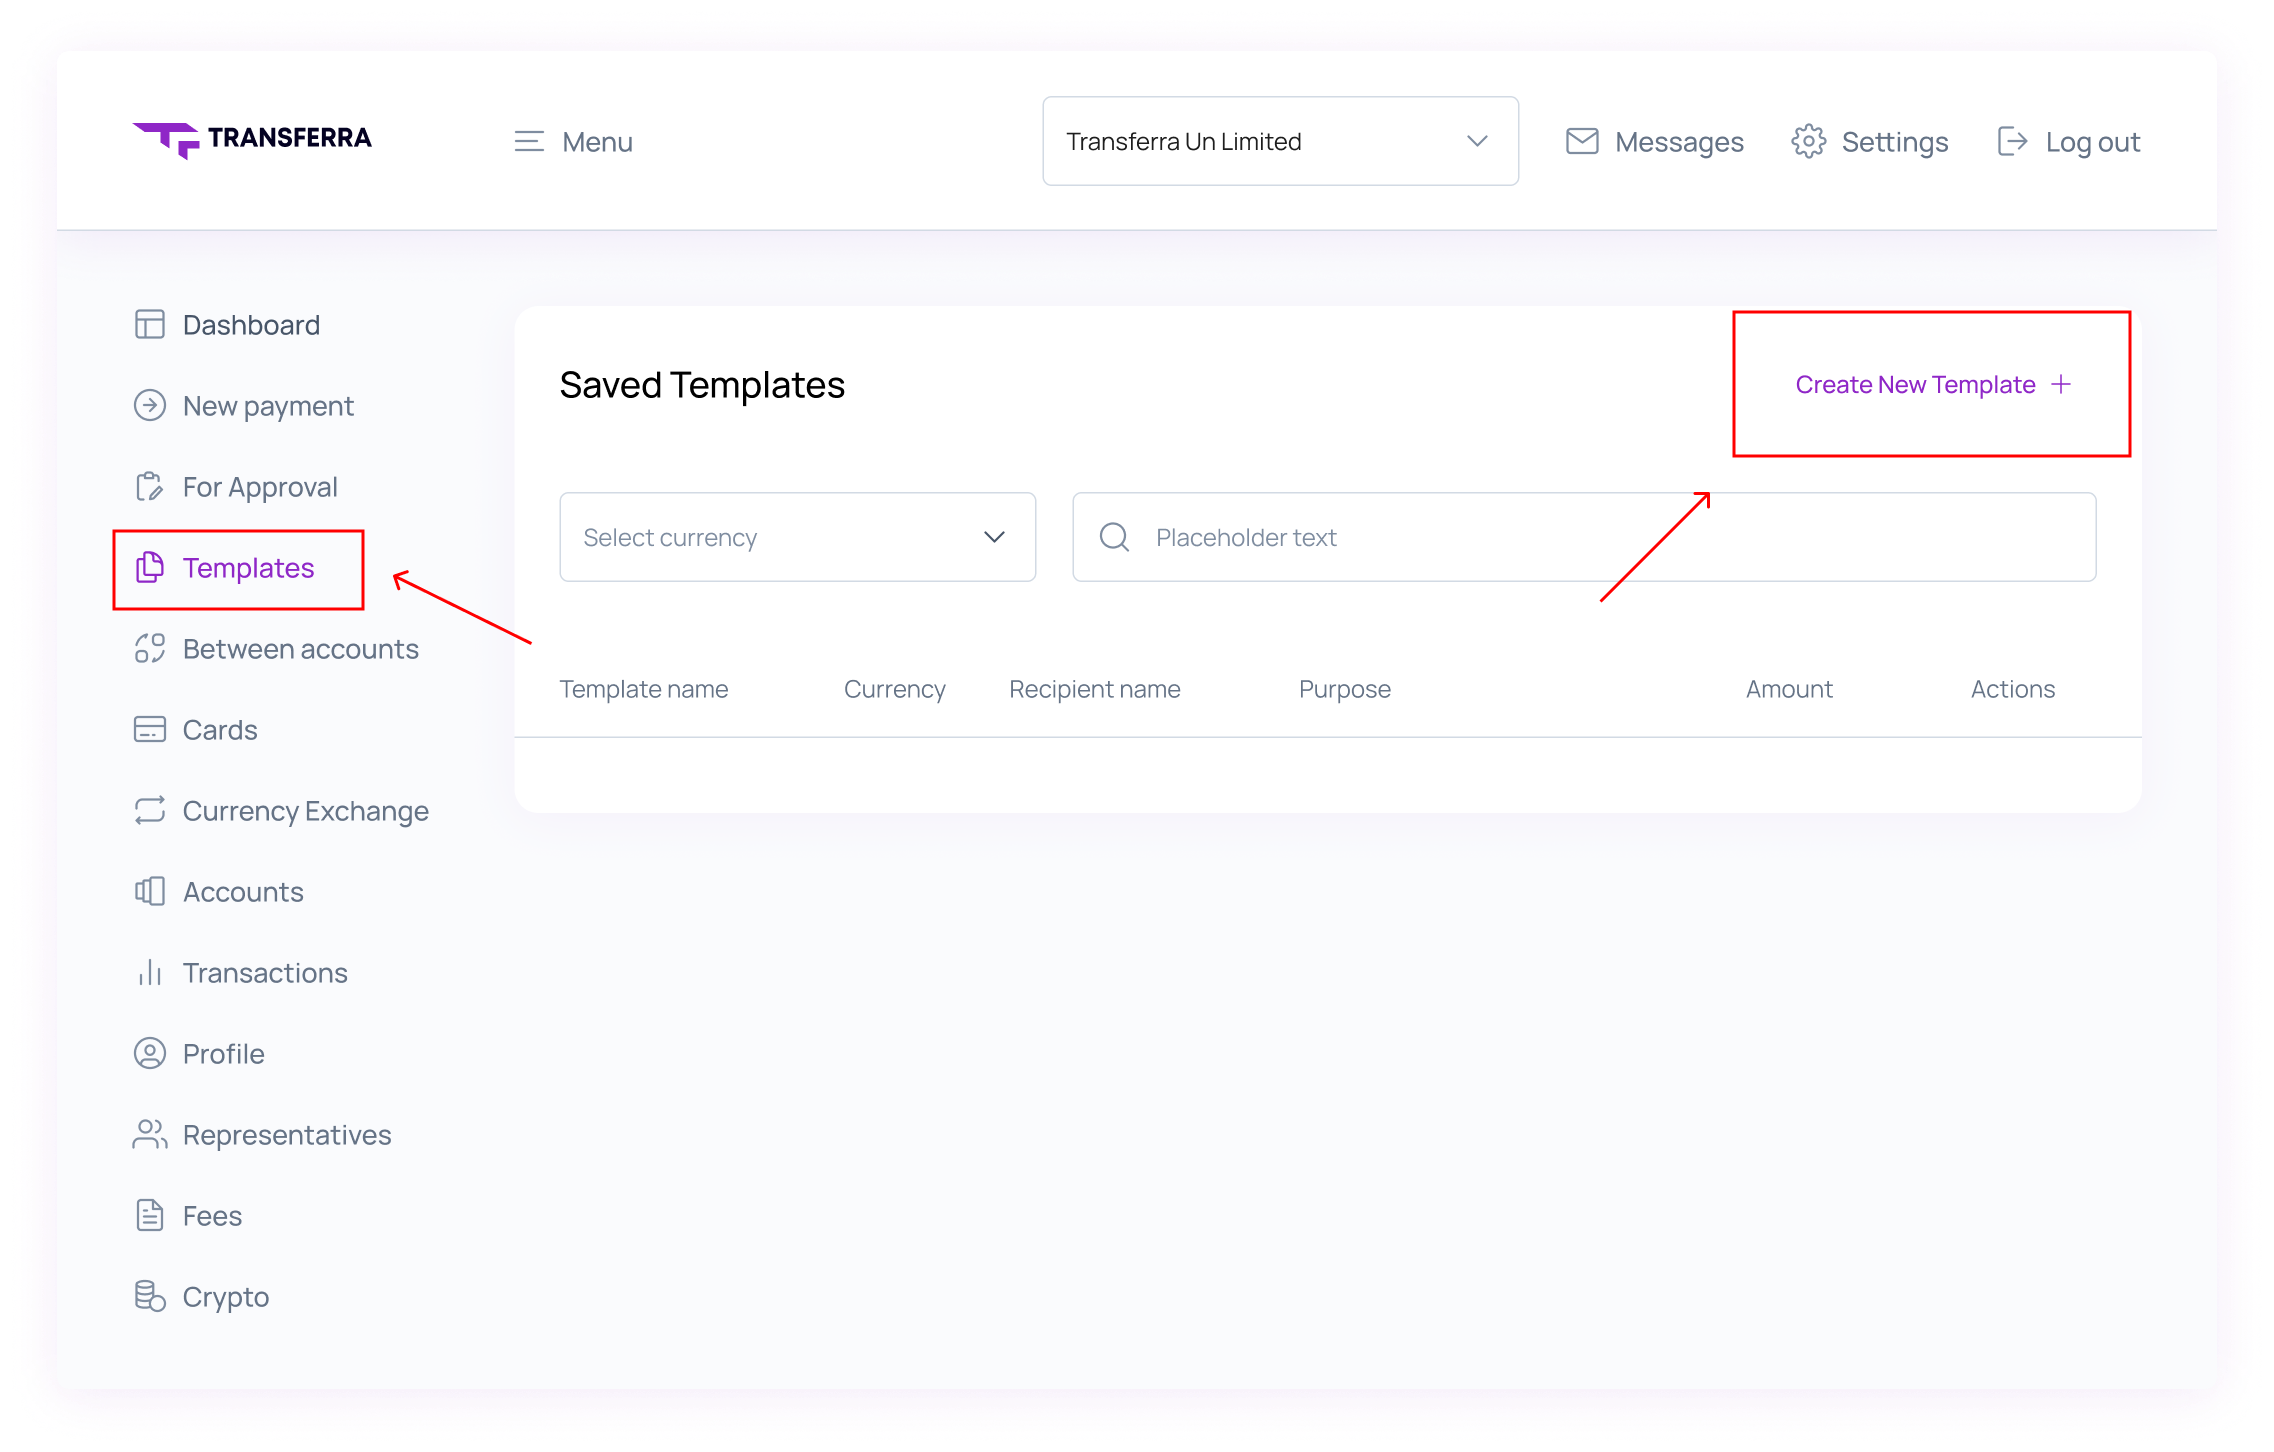
Step 1: Template Creation
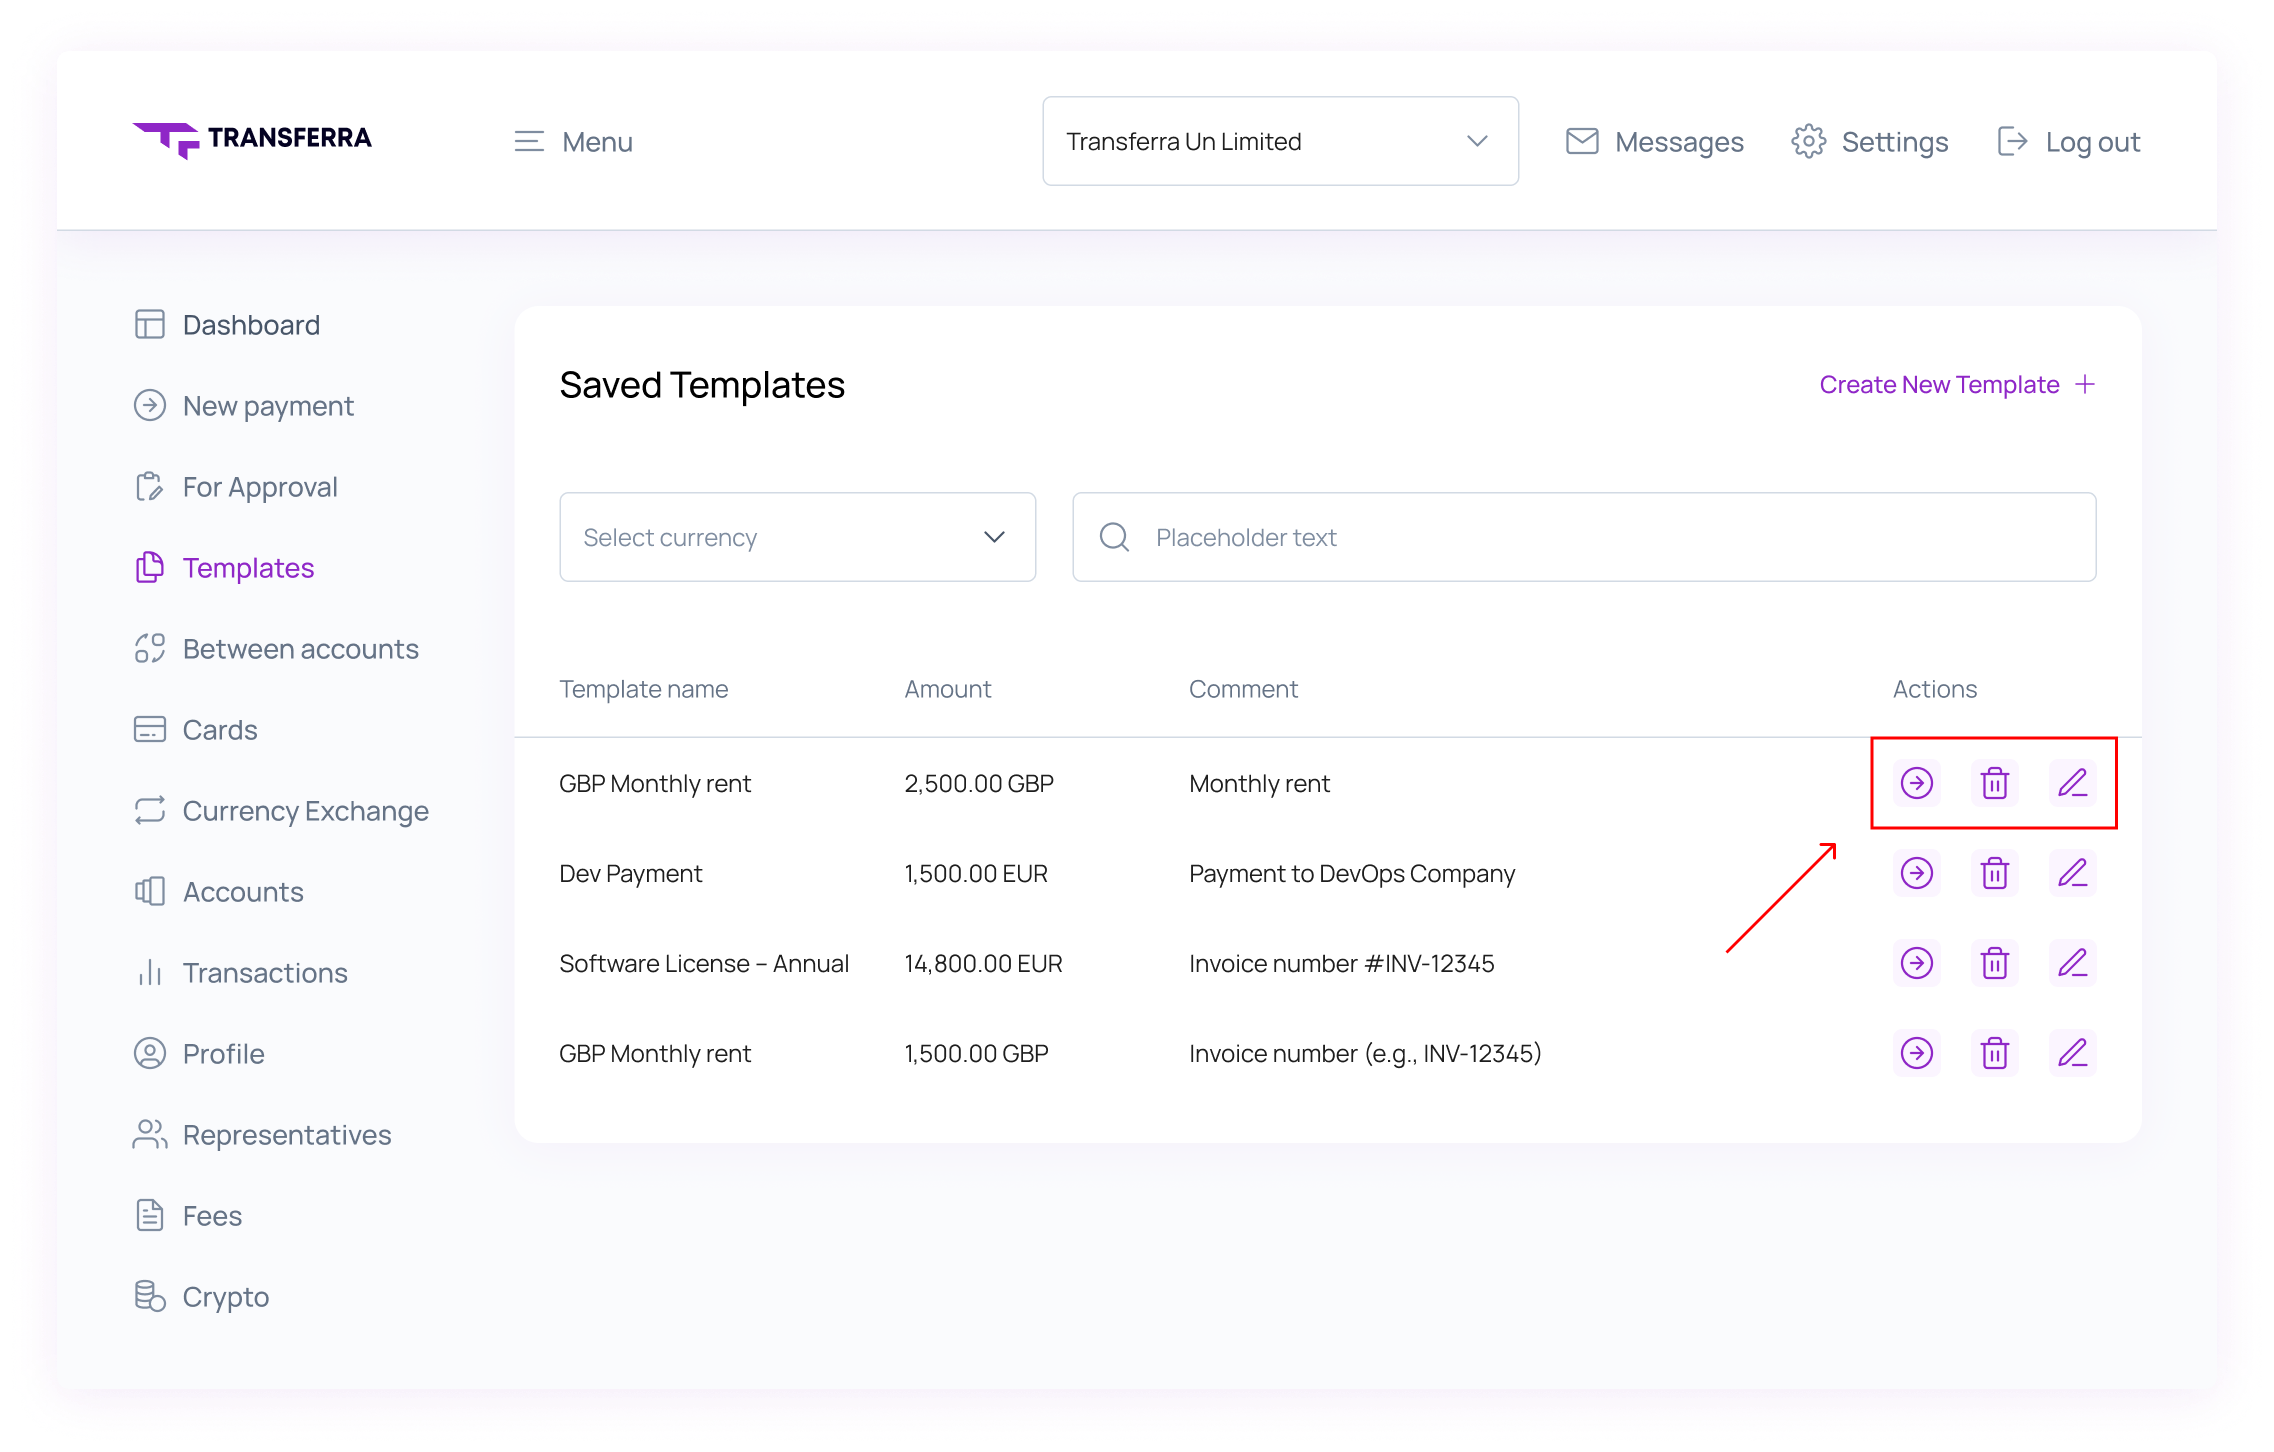
Go to the “Templates” section from the menu on the left. Then click on “Create New Template” to get started.
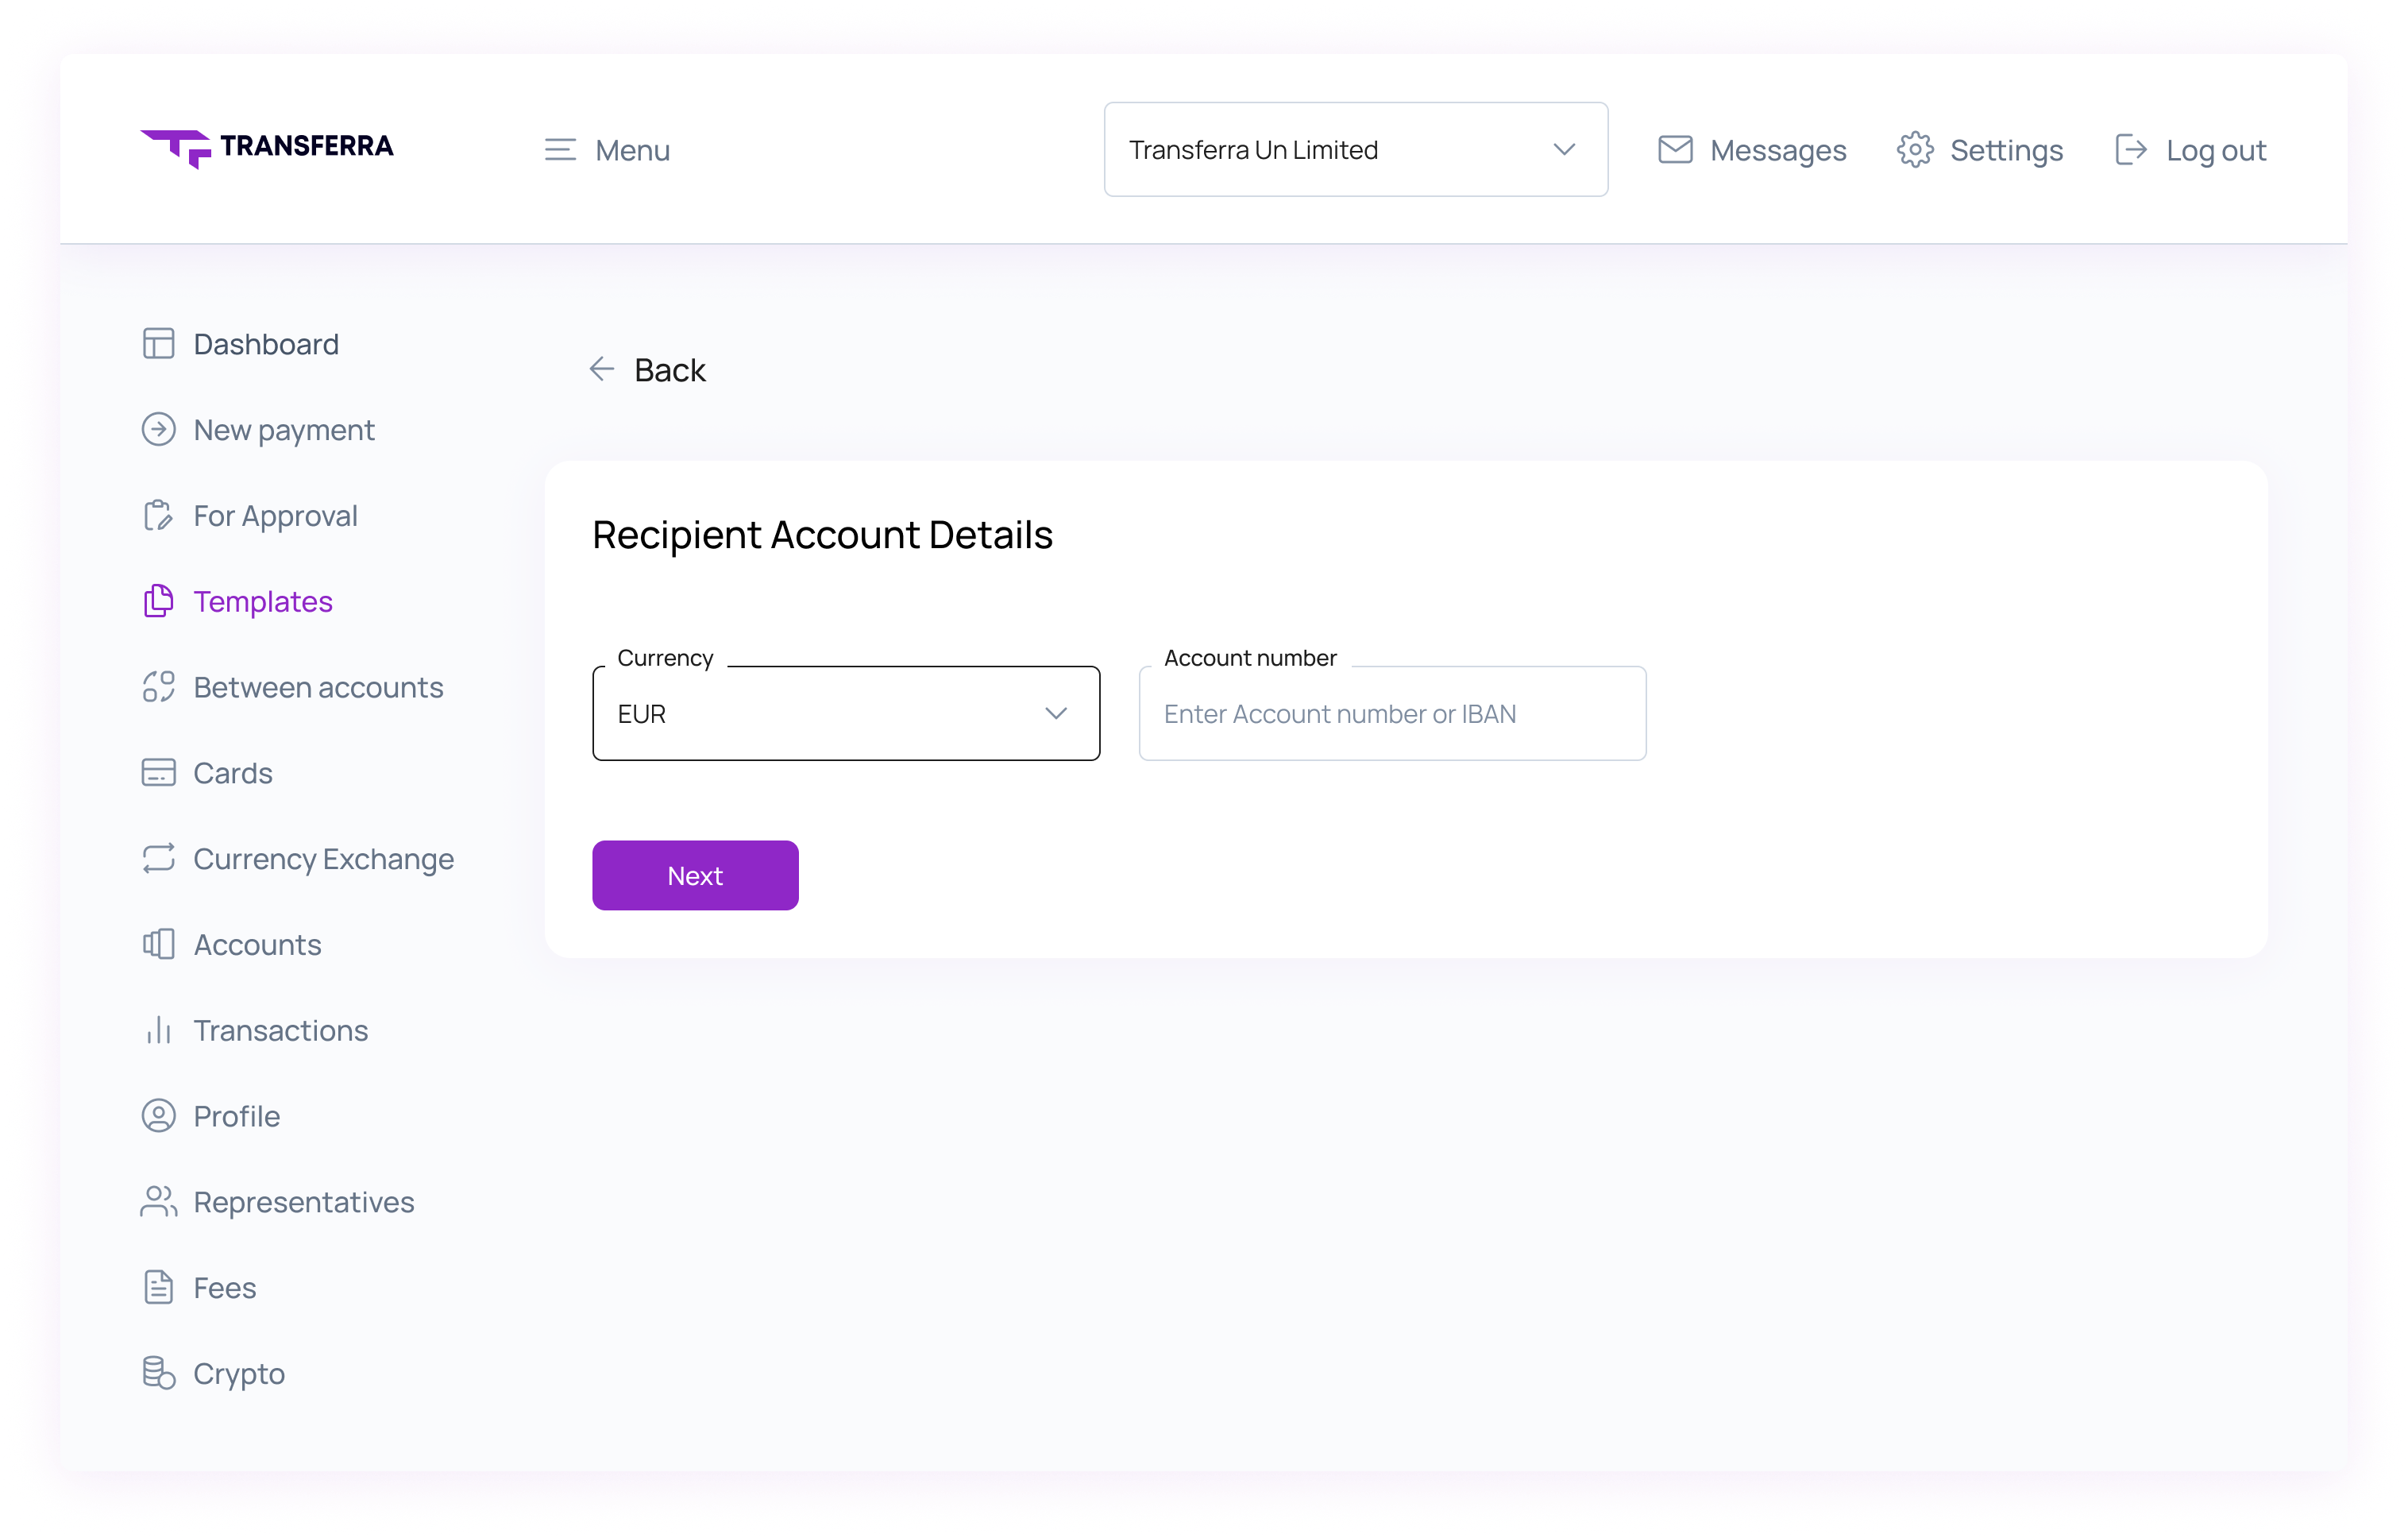
Step 2: Select Currency and Enter Account Number
Choose your preferred currency (e.g., EUR) and input the recipient’s account number.
(Please note that the flow may be slightly different depending on the currency you choose).
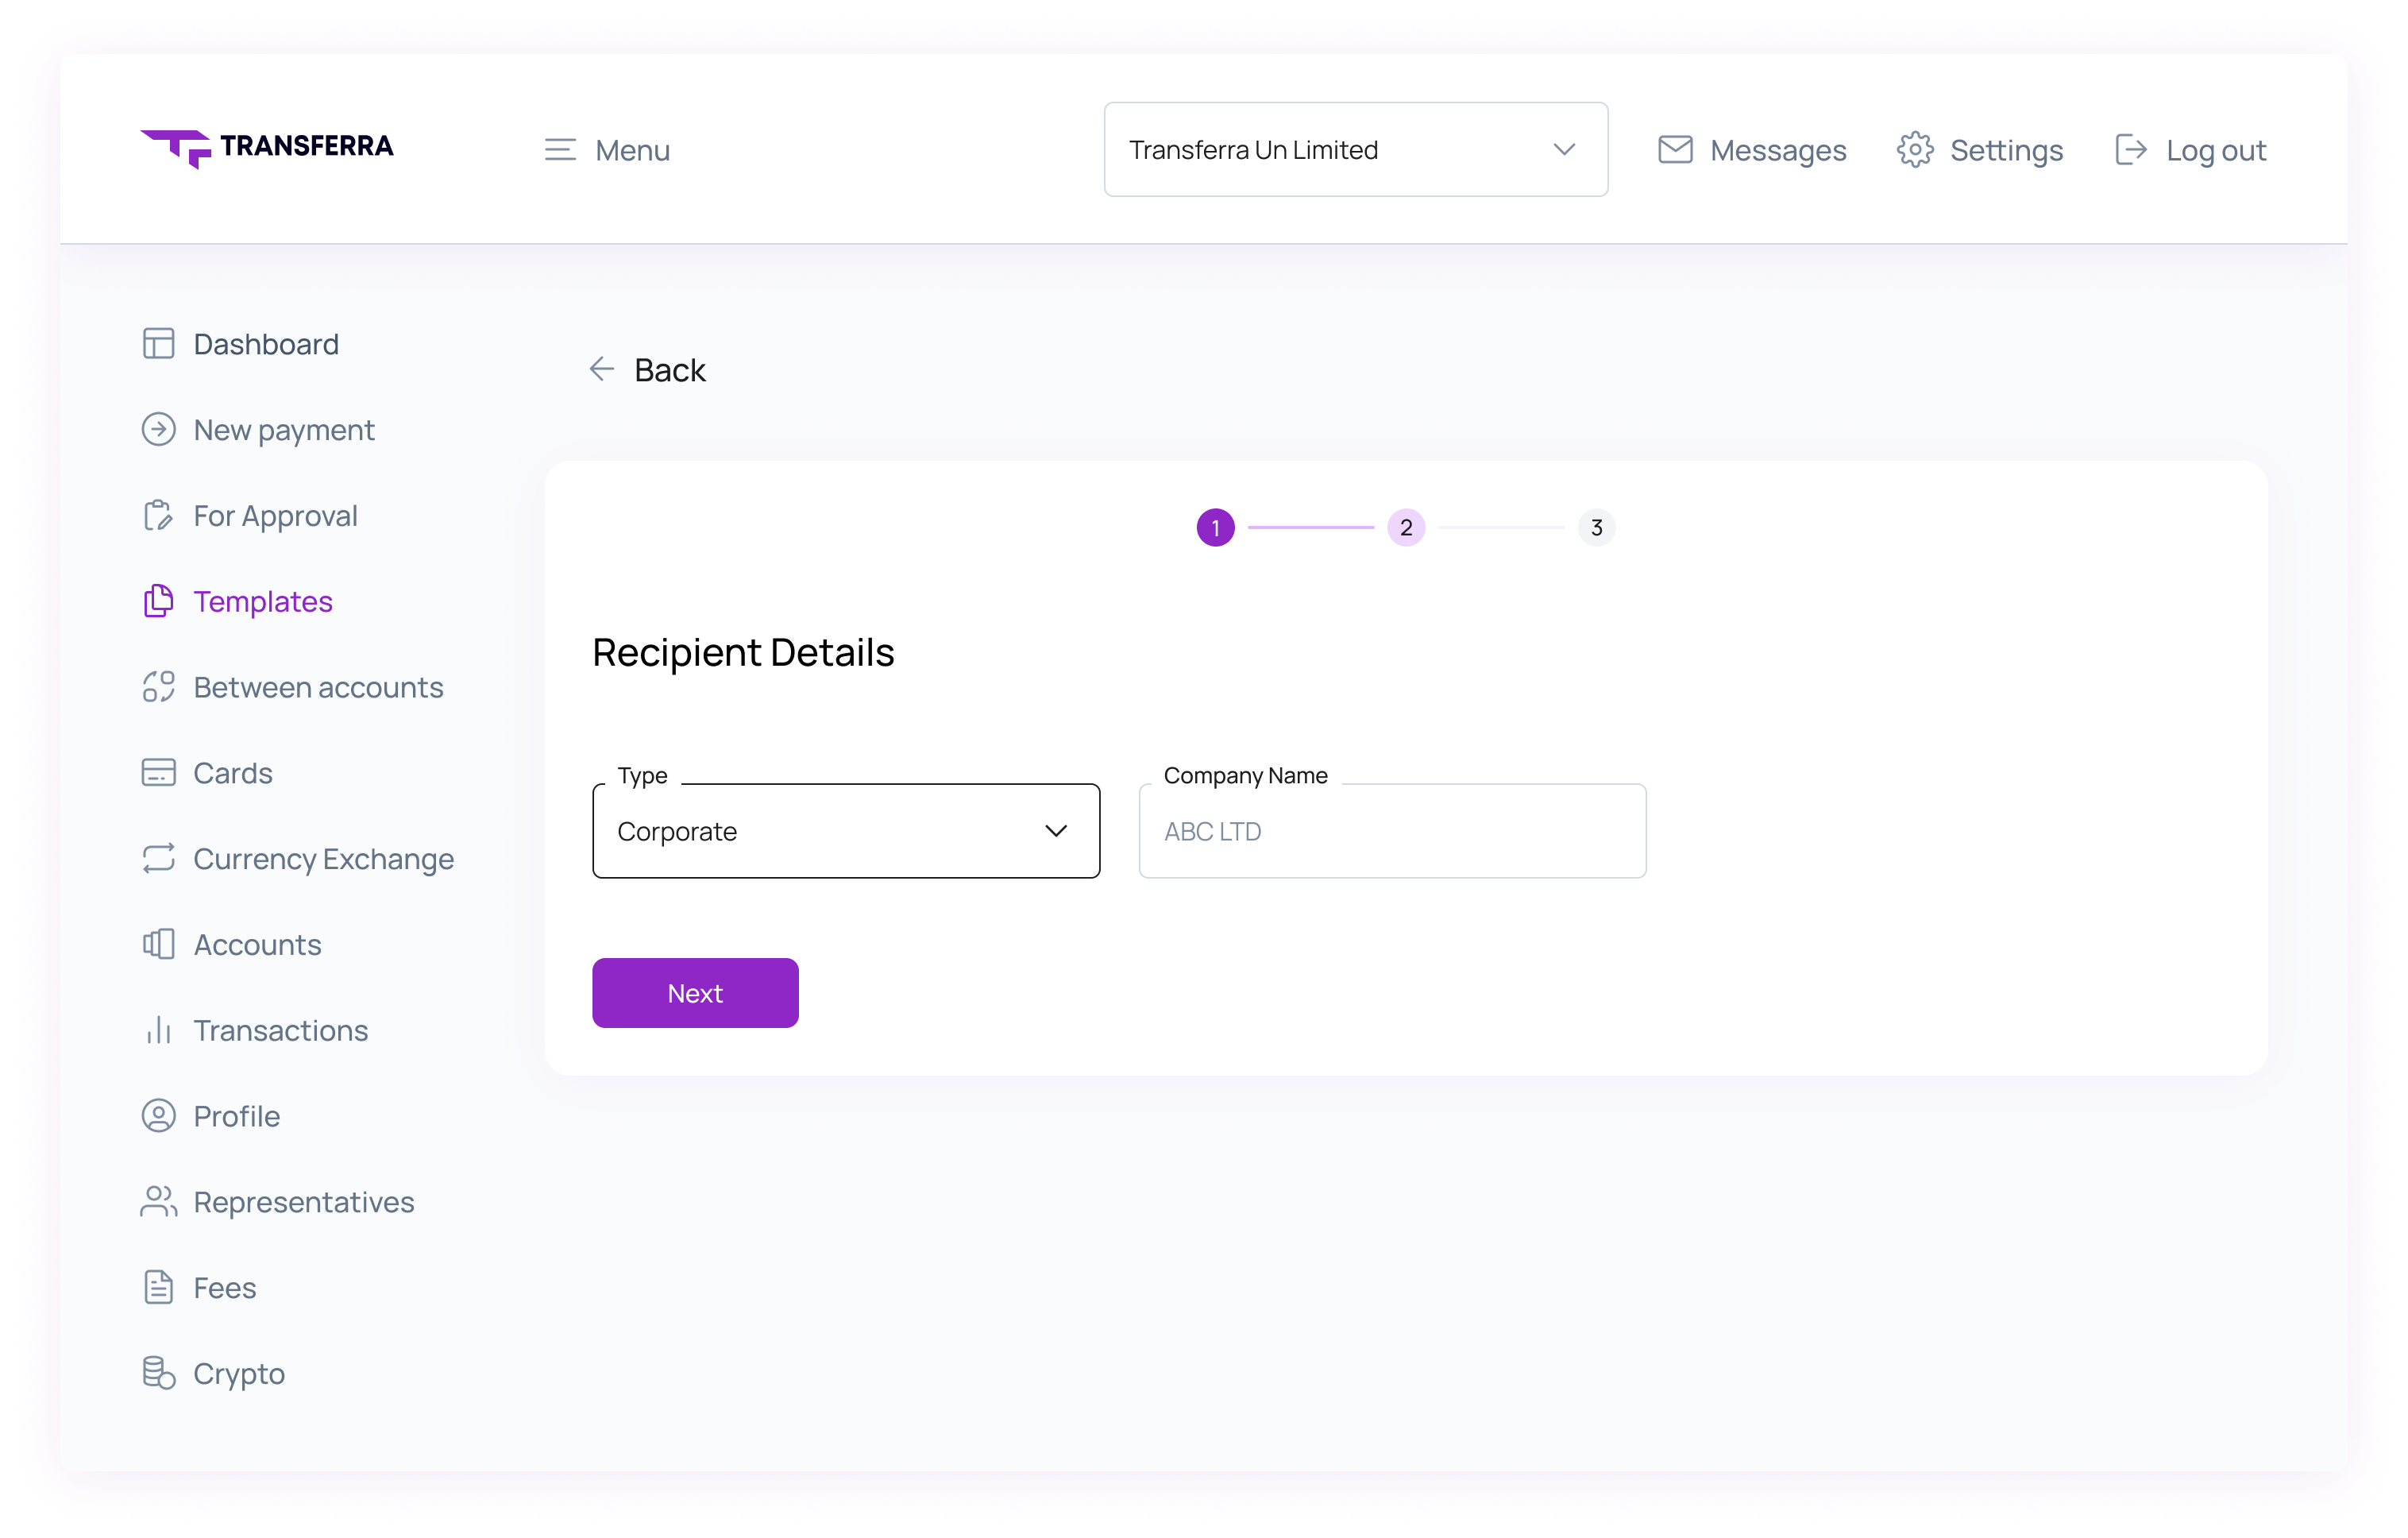
Step 3: Enter Recipient Information
Please provide the recipient’s details. For corporate payments, enter the company name. For individual payments, enter the full name (first and last name) of the recipient.
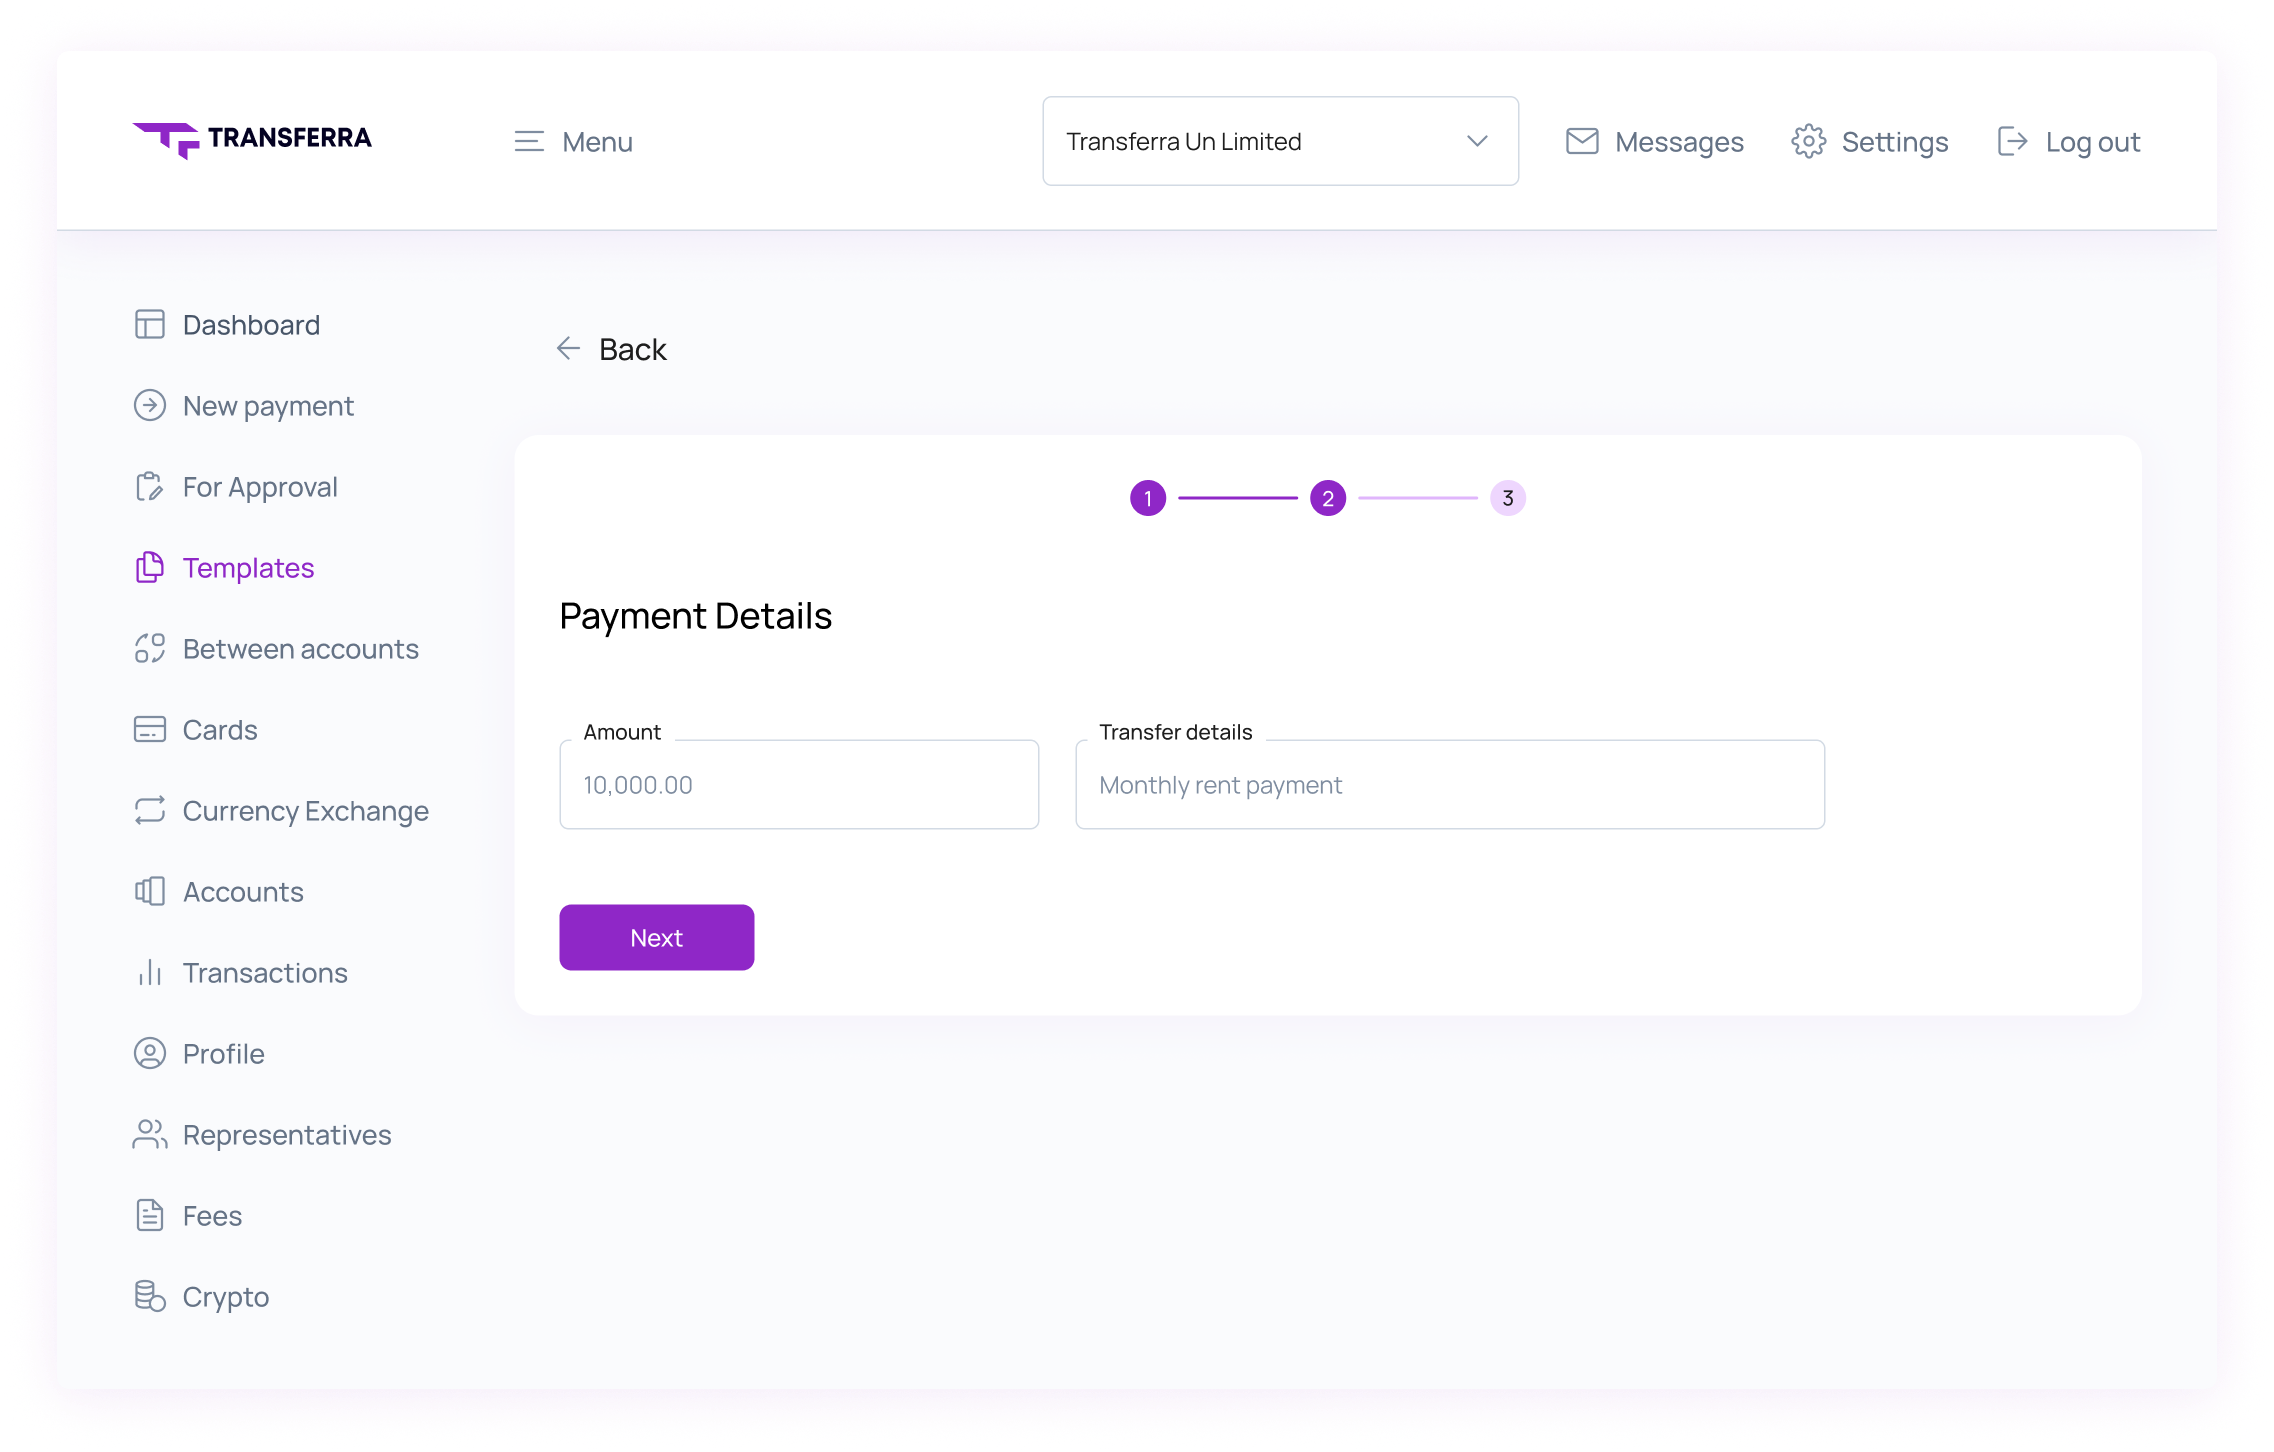
Step 4: Provide Payment Specifics
Specify the amount and transfer details.
Step 5: Review and Create
Carefully review all entered information, give a name to the template and click “Create”.
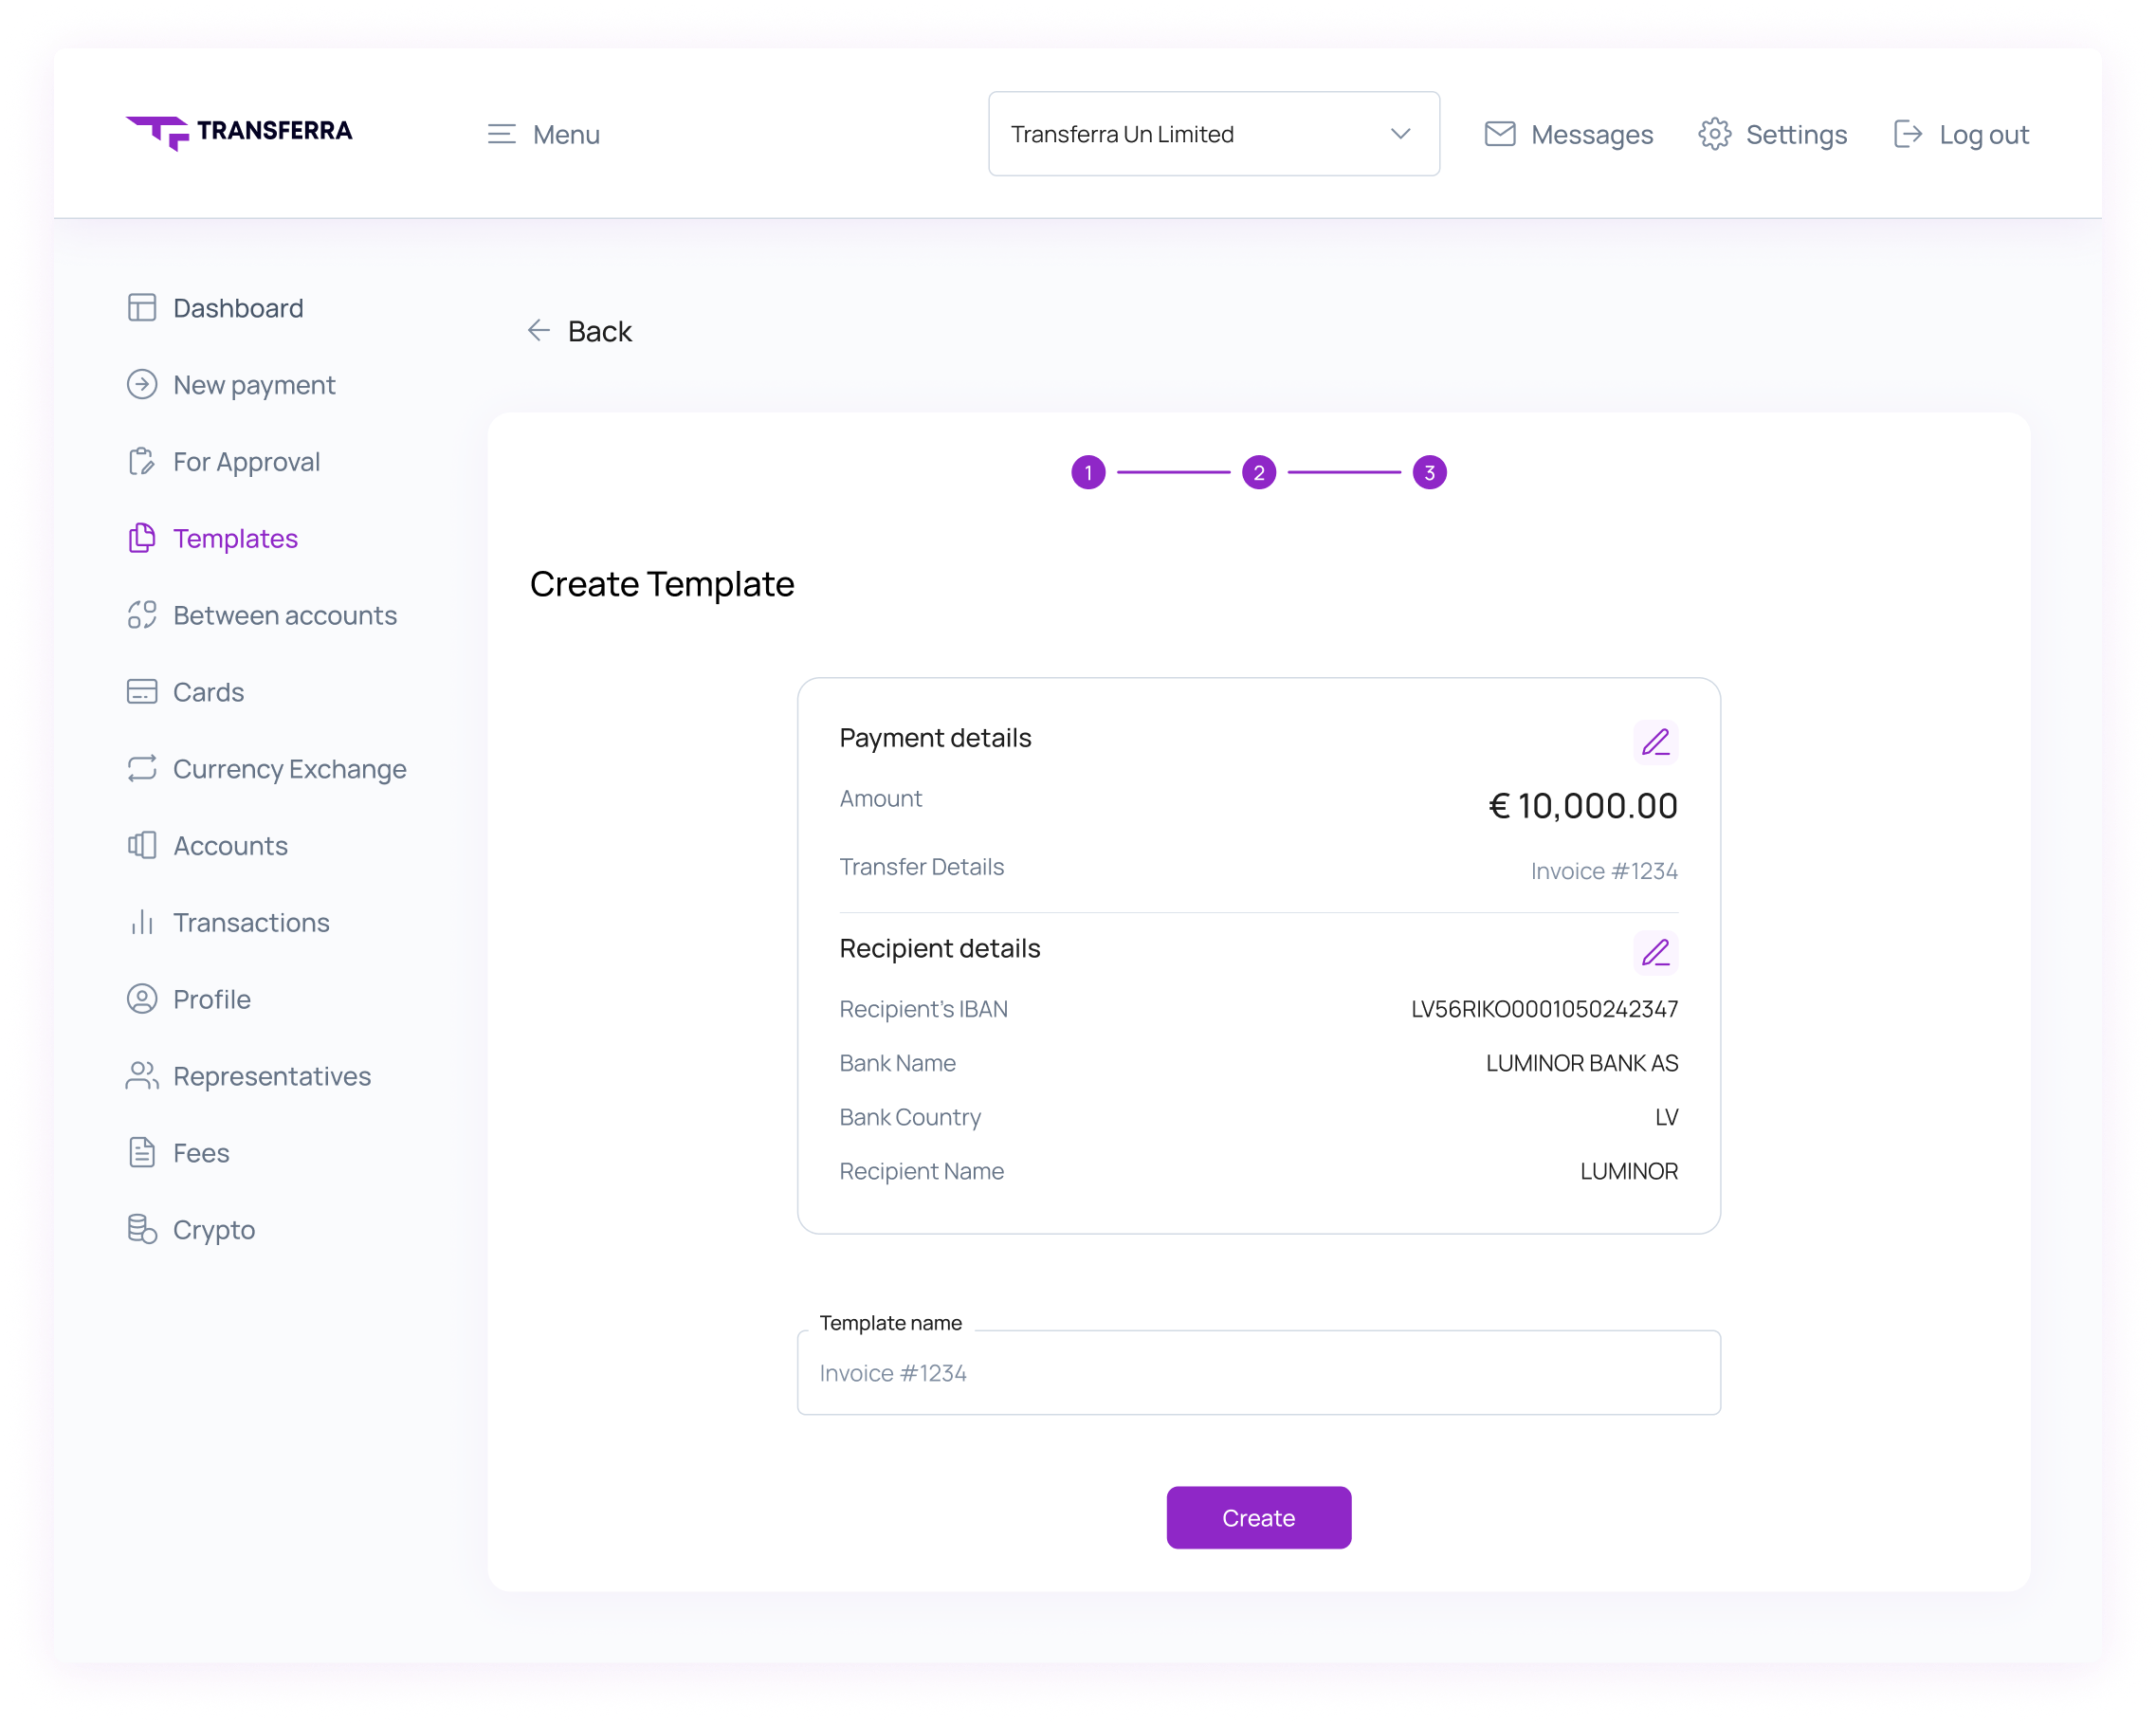
Once created, your templates will be stored in the “Templates” section, allowing you to easily edit, delete, or use any of the created templates.
Managing Payments with For Approval Workflow
The Approval Workflow introduces an extra layer of security and clarity, allowing distinct roles for creating and approving payments. Here’s how to use it:
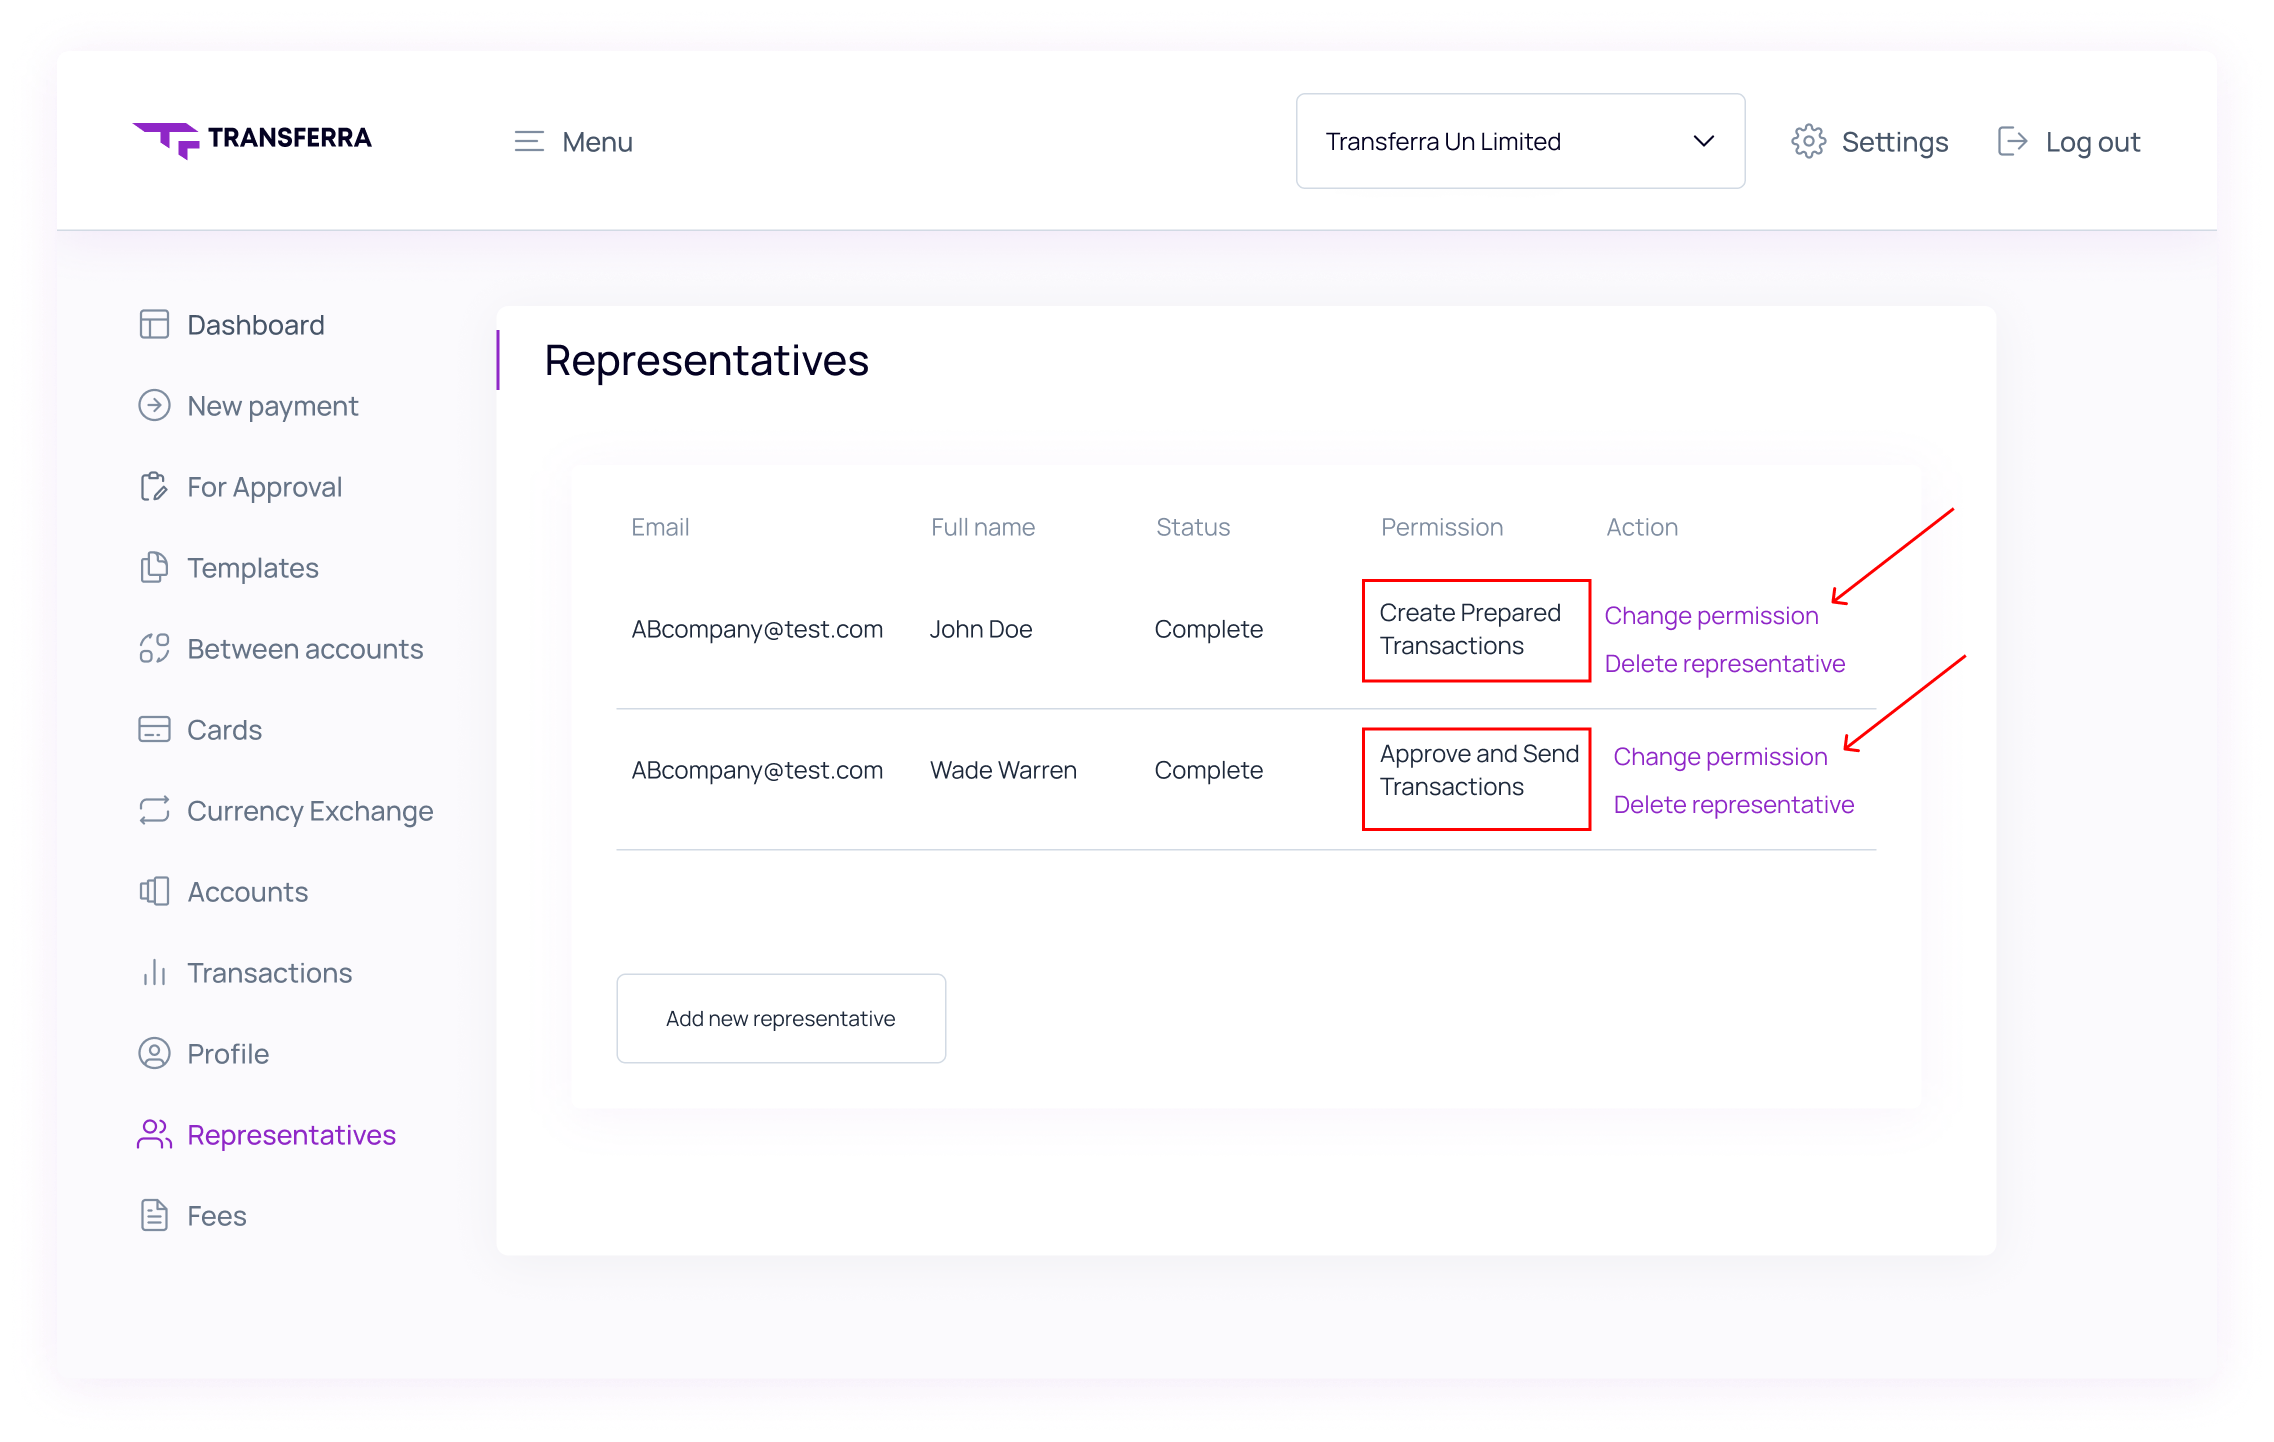
Step 1: Setting Permissions in the Representatives Section
To fully utilise the Approval Workflow, it’s important to assign the right permissions to team members in the “Representatives” section of your Transferra account.
- To allow someone to create transactions for approval, tick the box labelled “Create Prepared Transactions”.
- To allow someone to approve and send transactions, tick the box labelled “Approve and Send Transactions”.
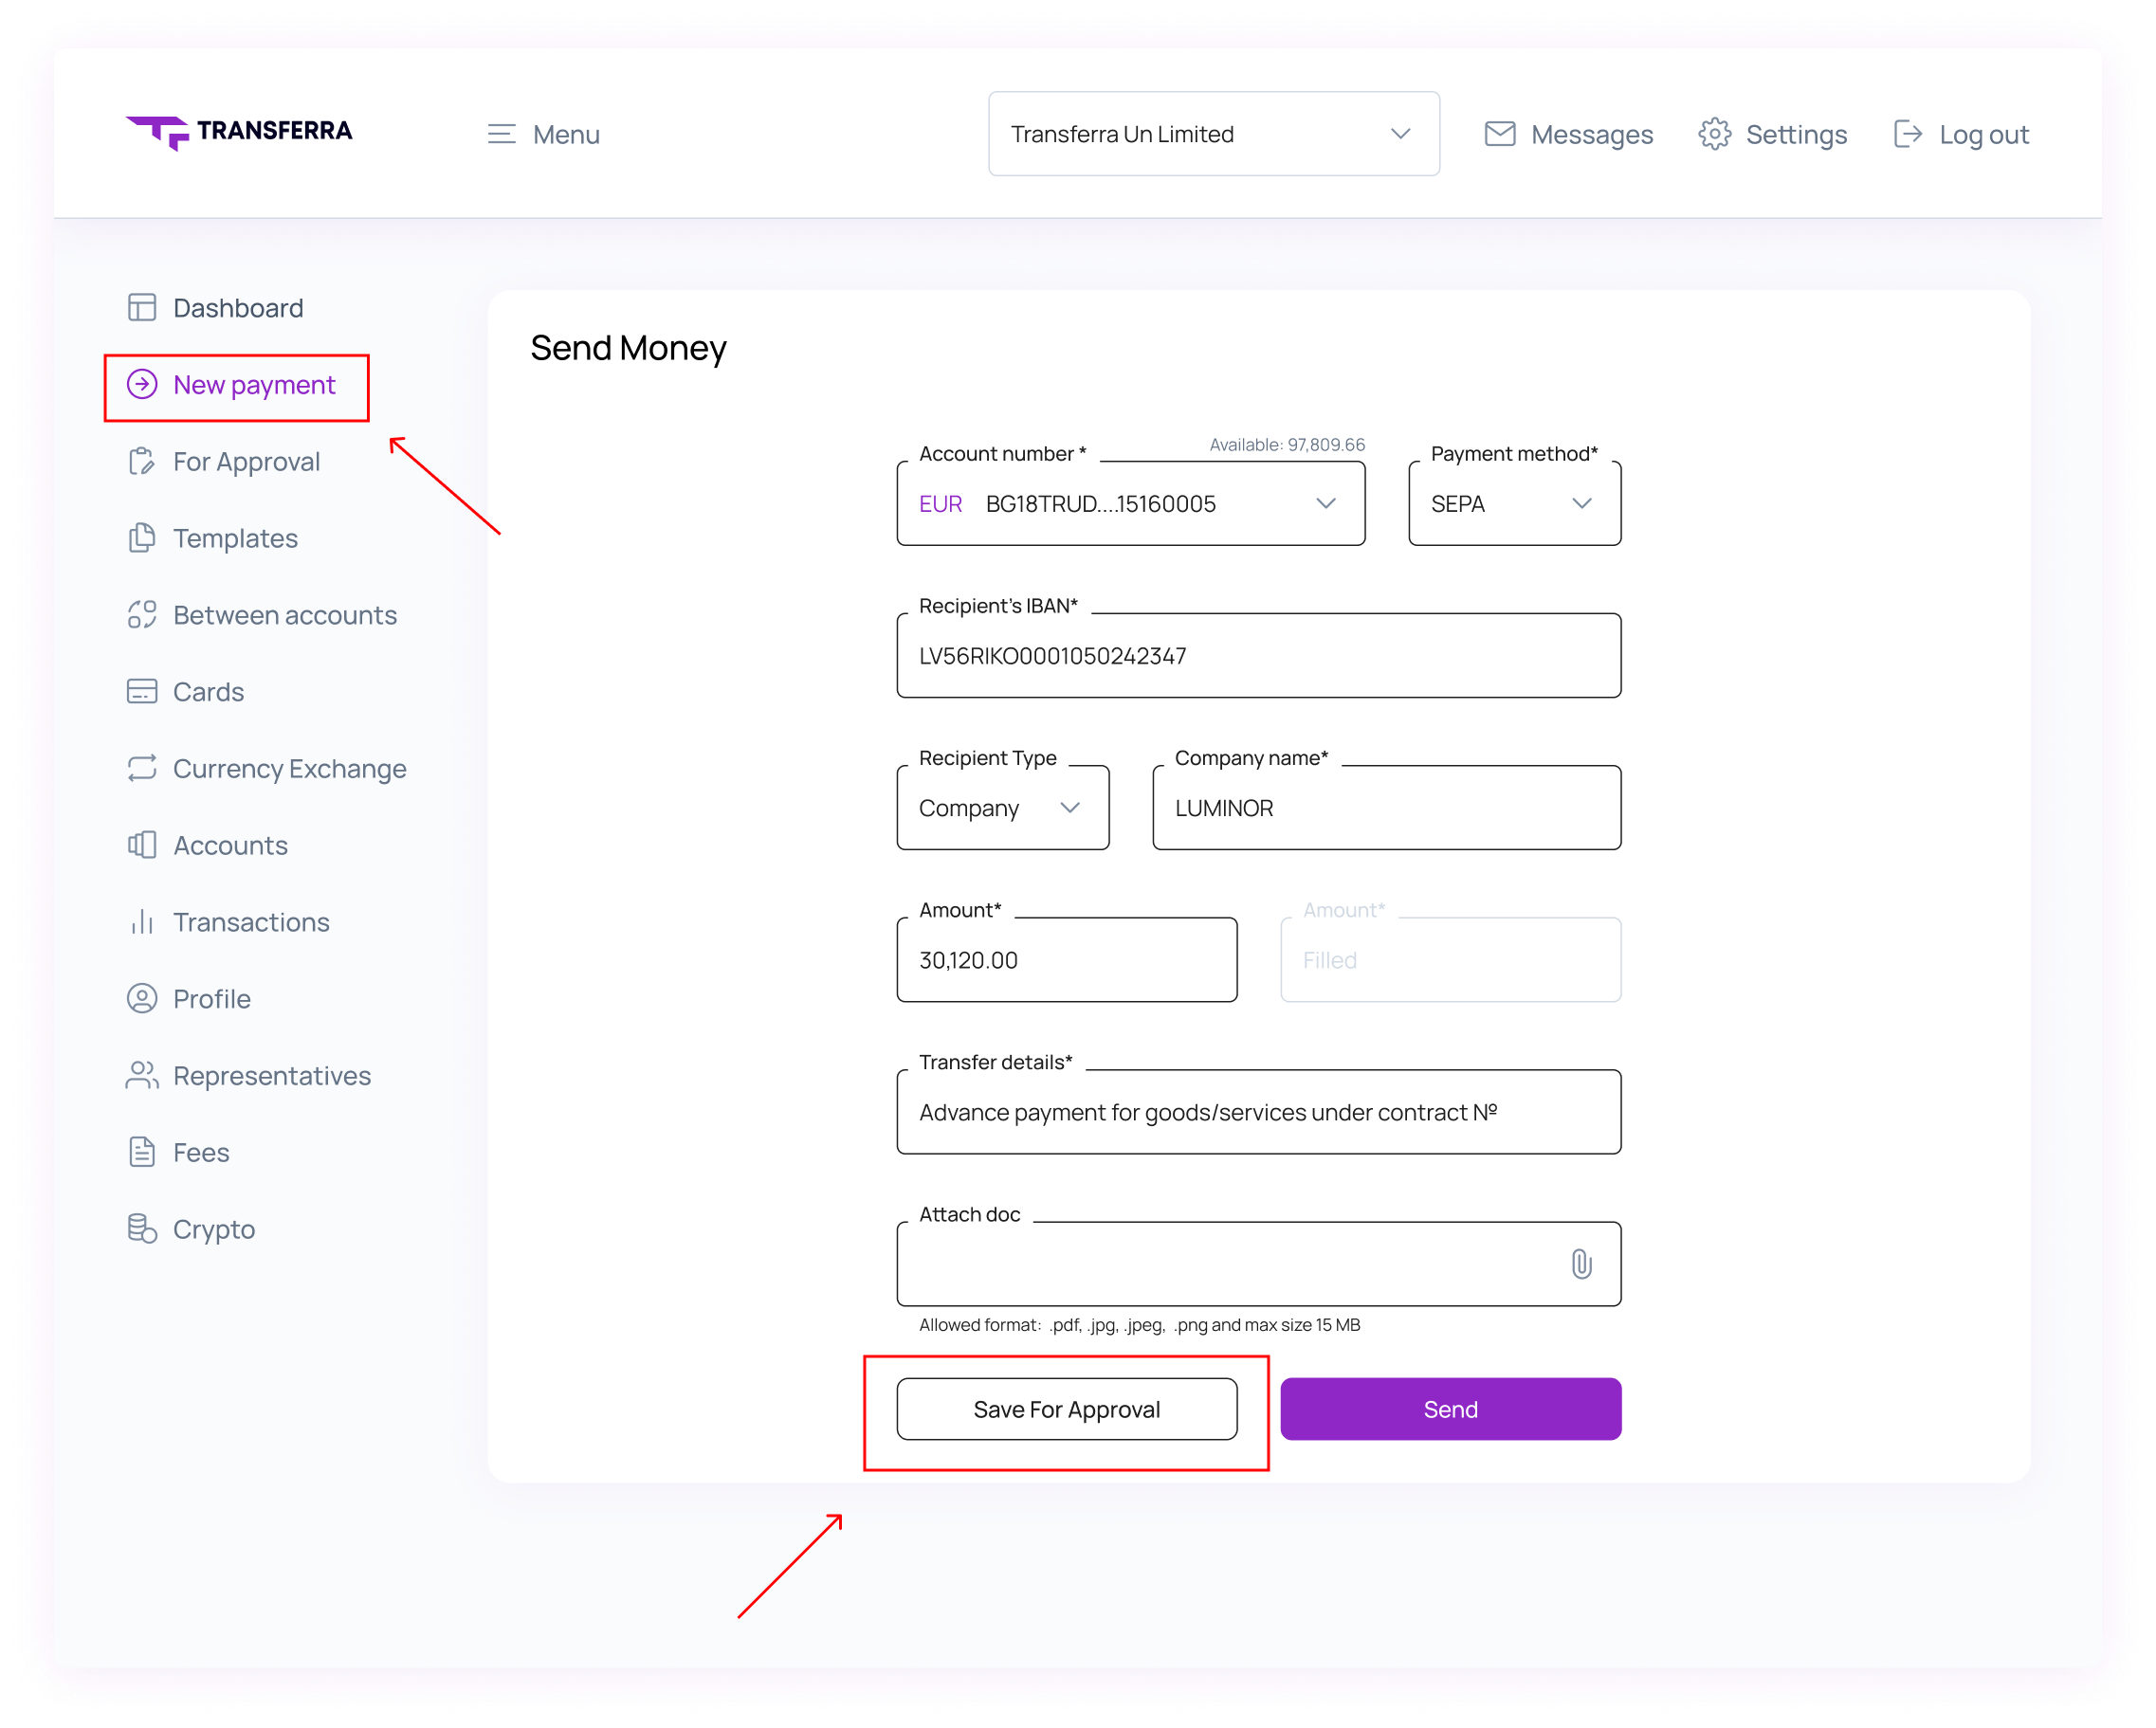
Step 2: Save Payment for Approval
In order to save a payment for approval, fill in the details in the “New Payment” section and click the “For Approval” button instead of sending it immediately.
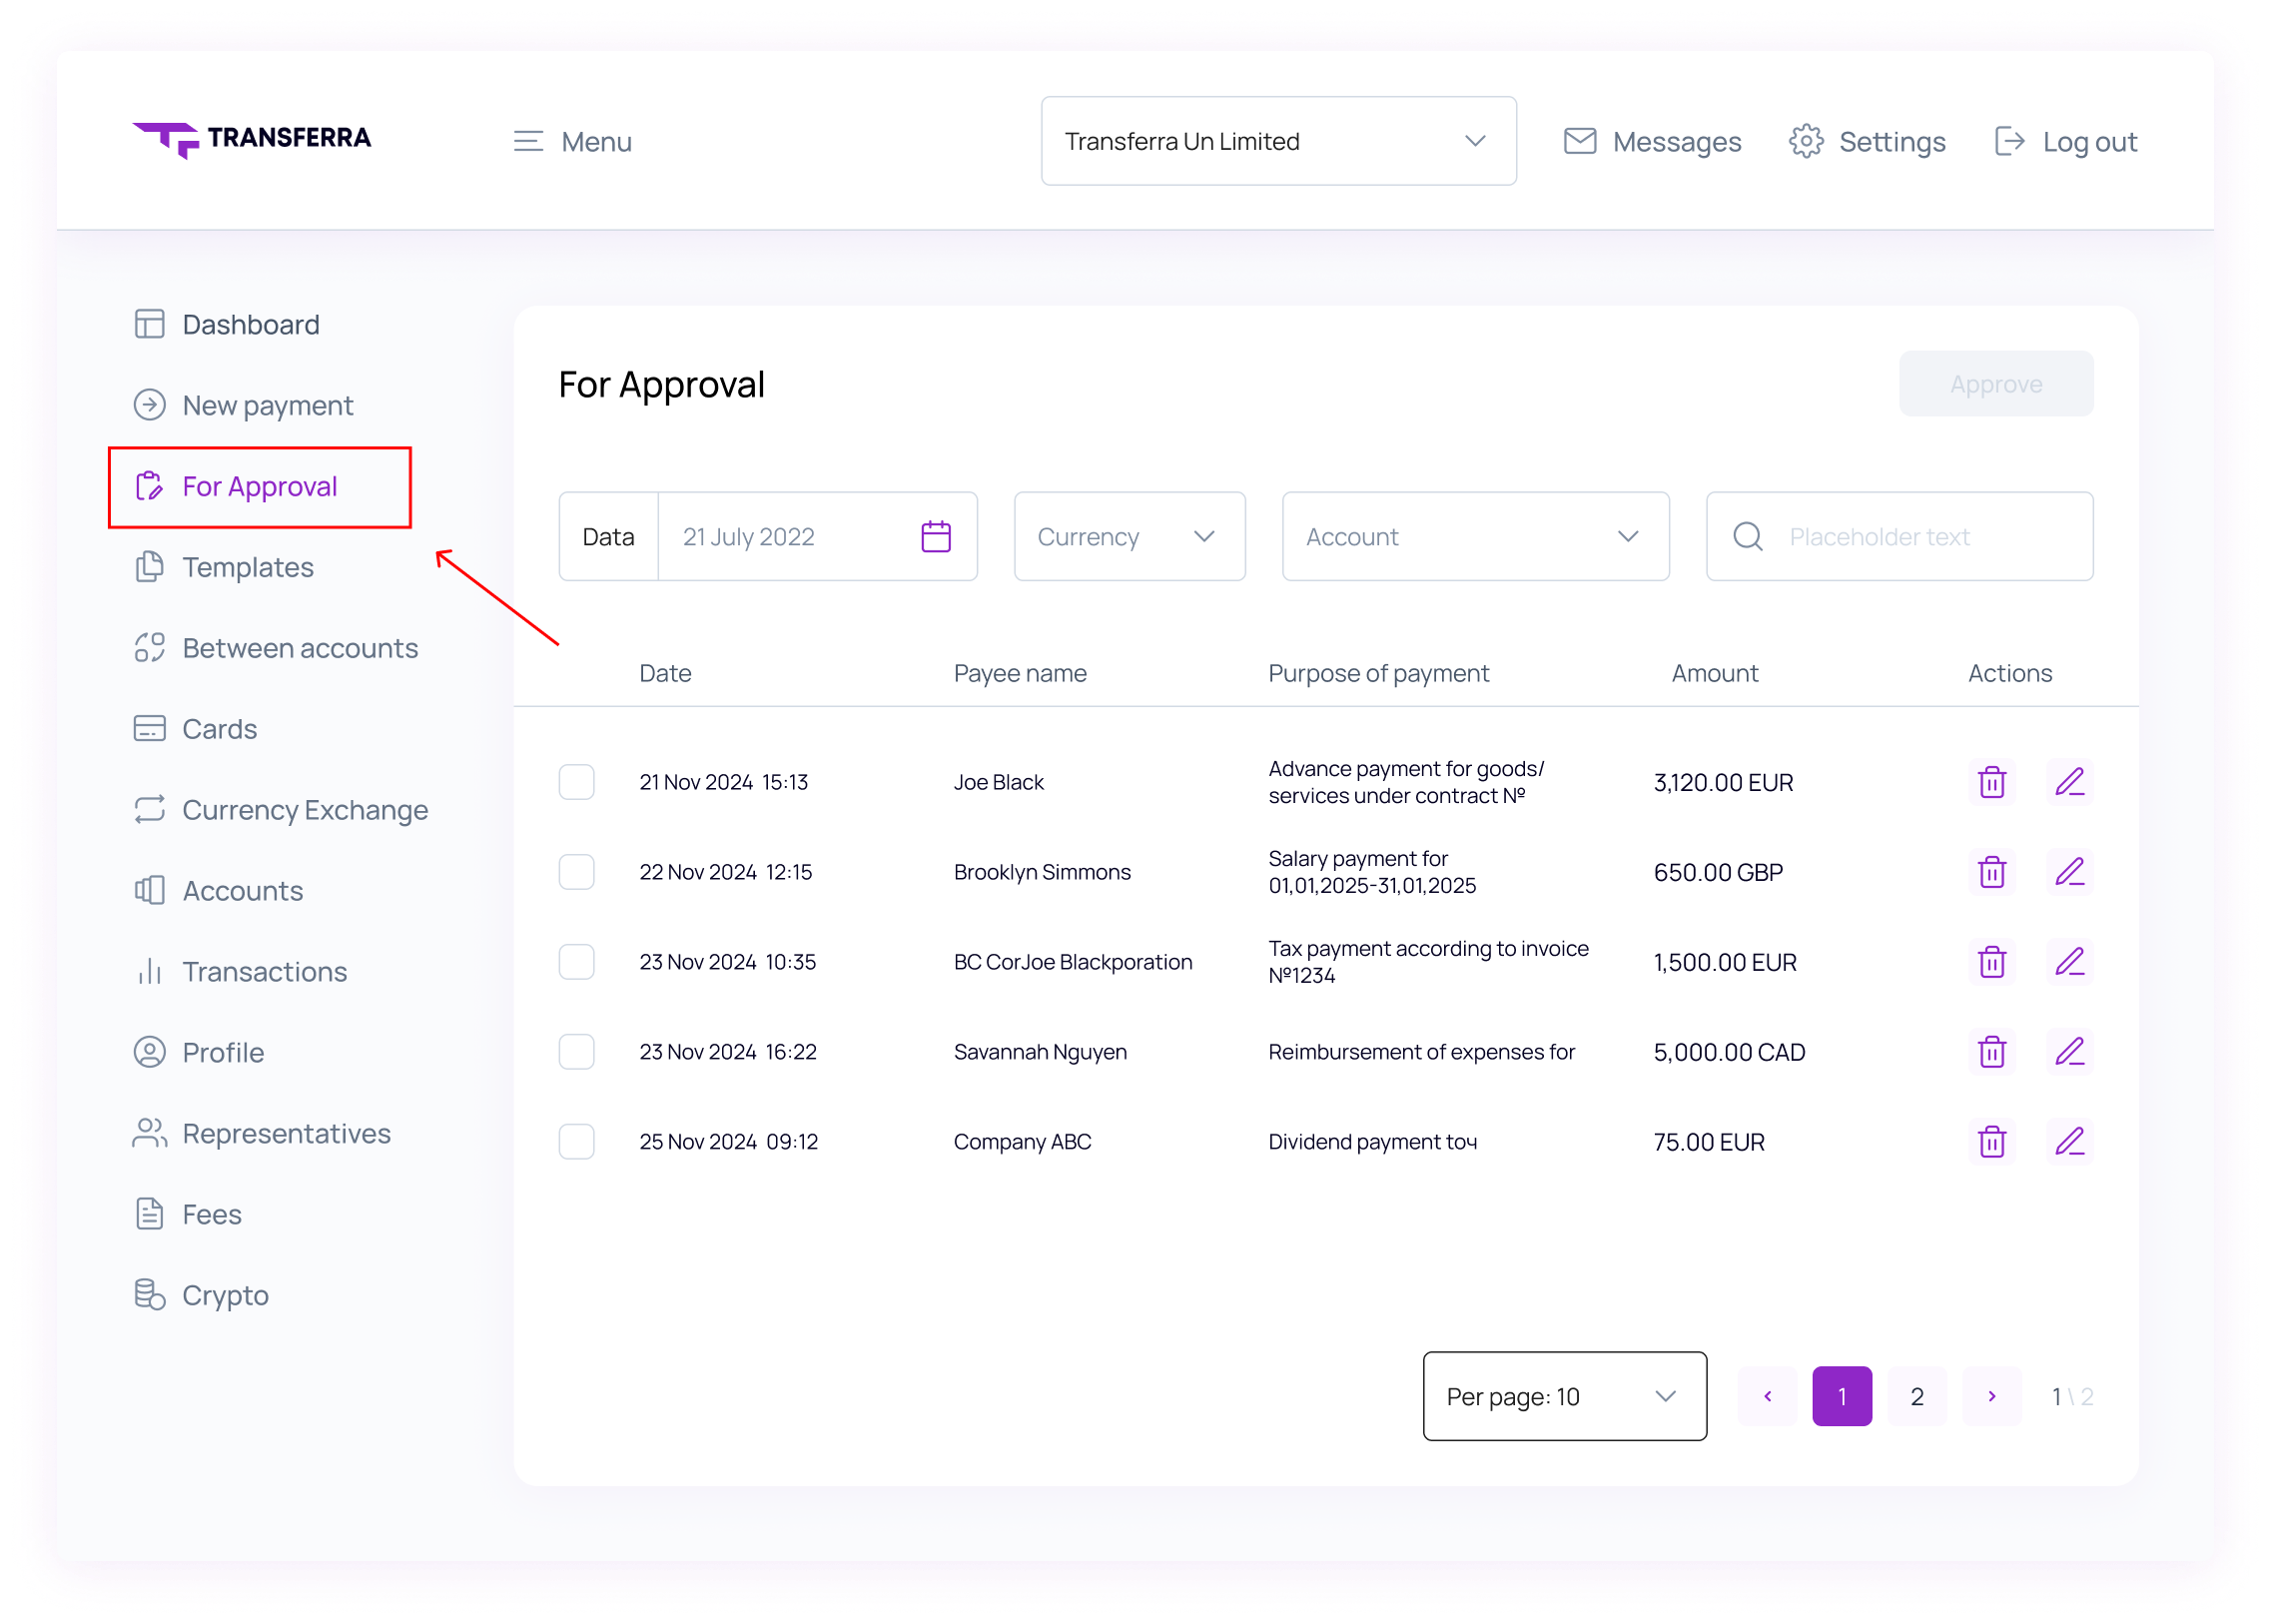
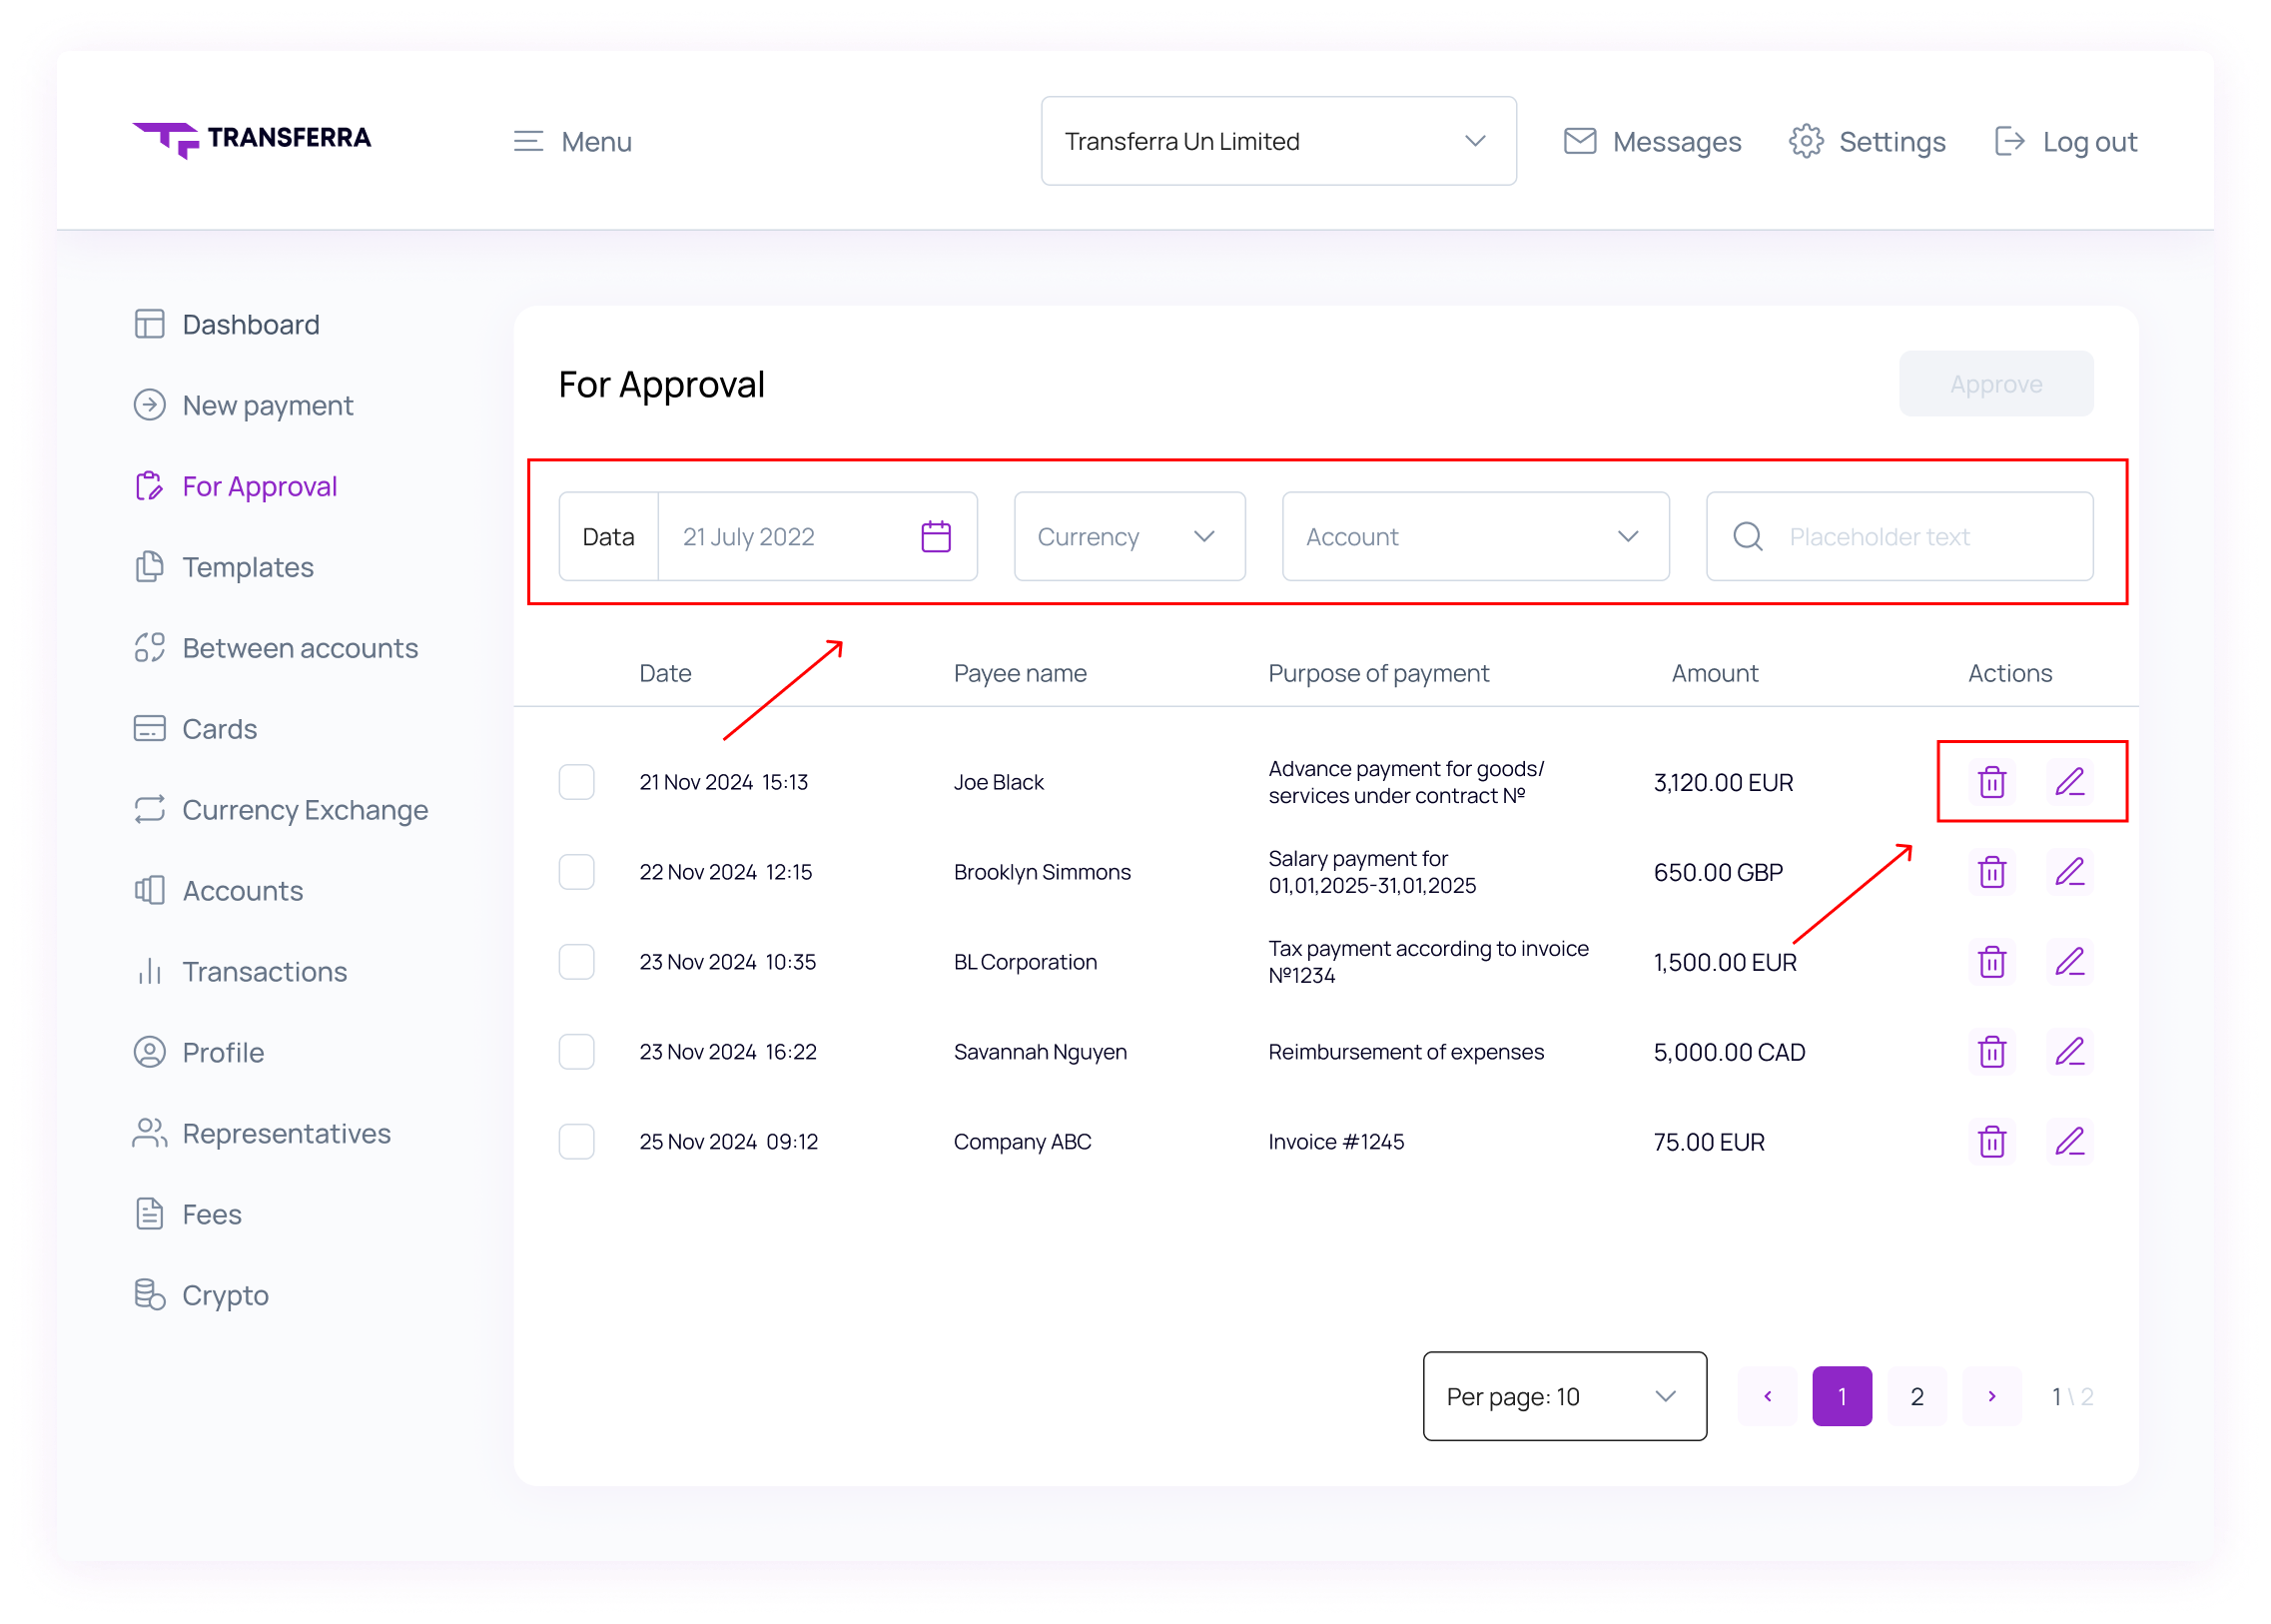
Step 3: View Saved Payments
Payments awaiting approval will appear in the “For Approval” section from the menu on the left.
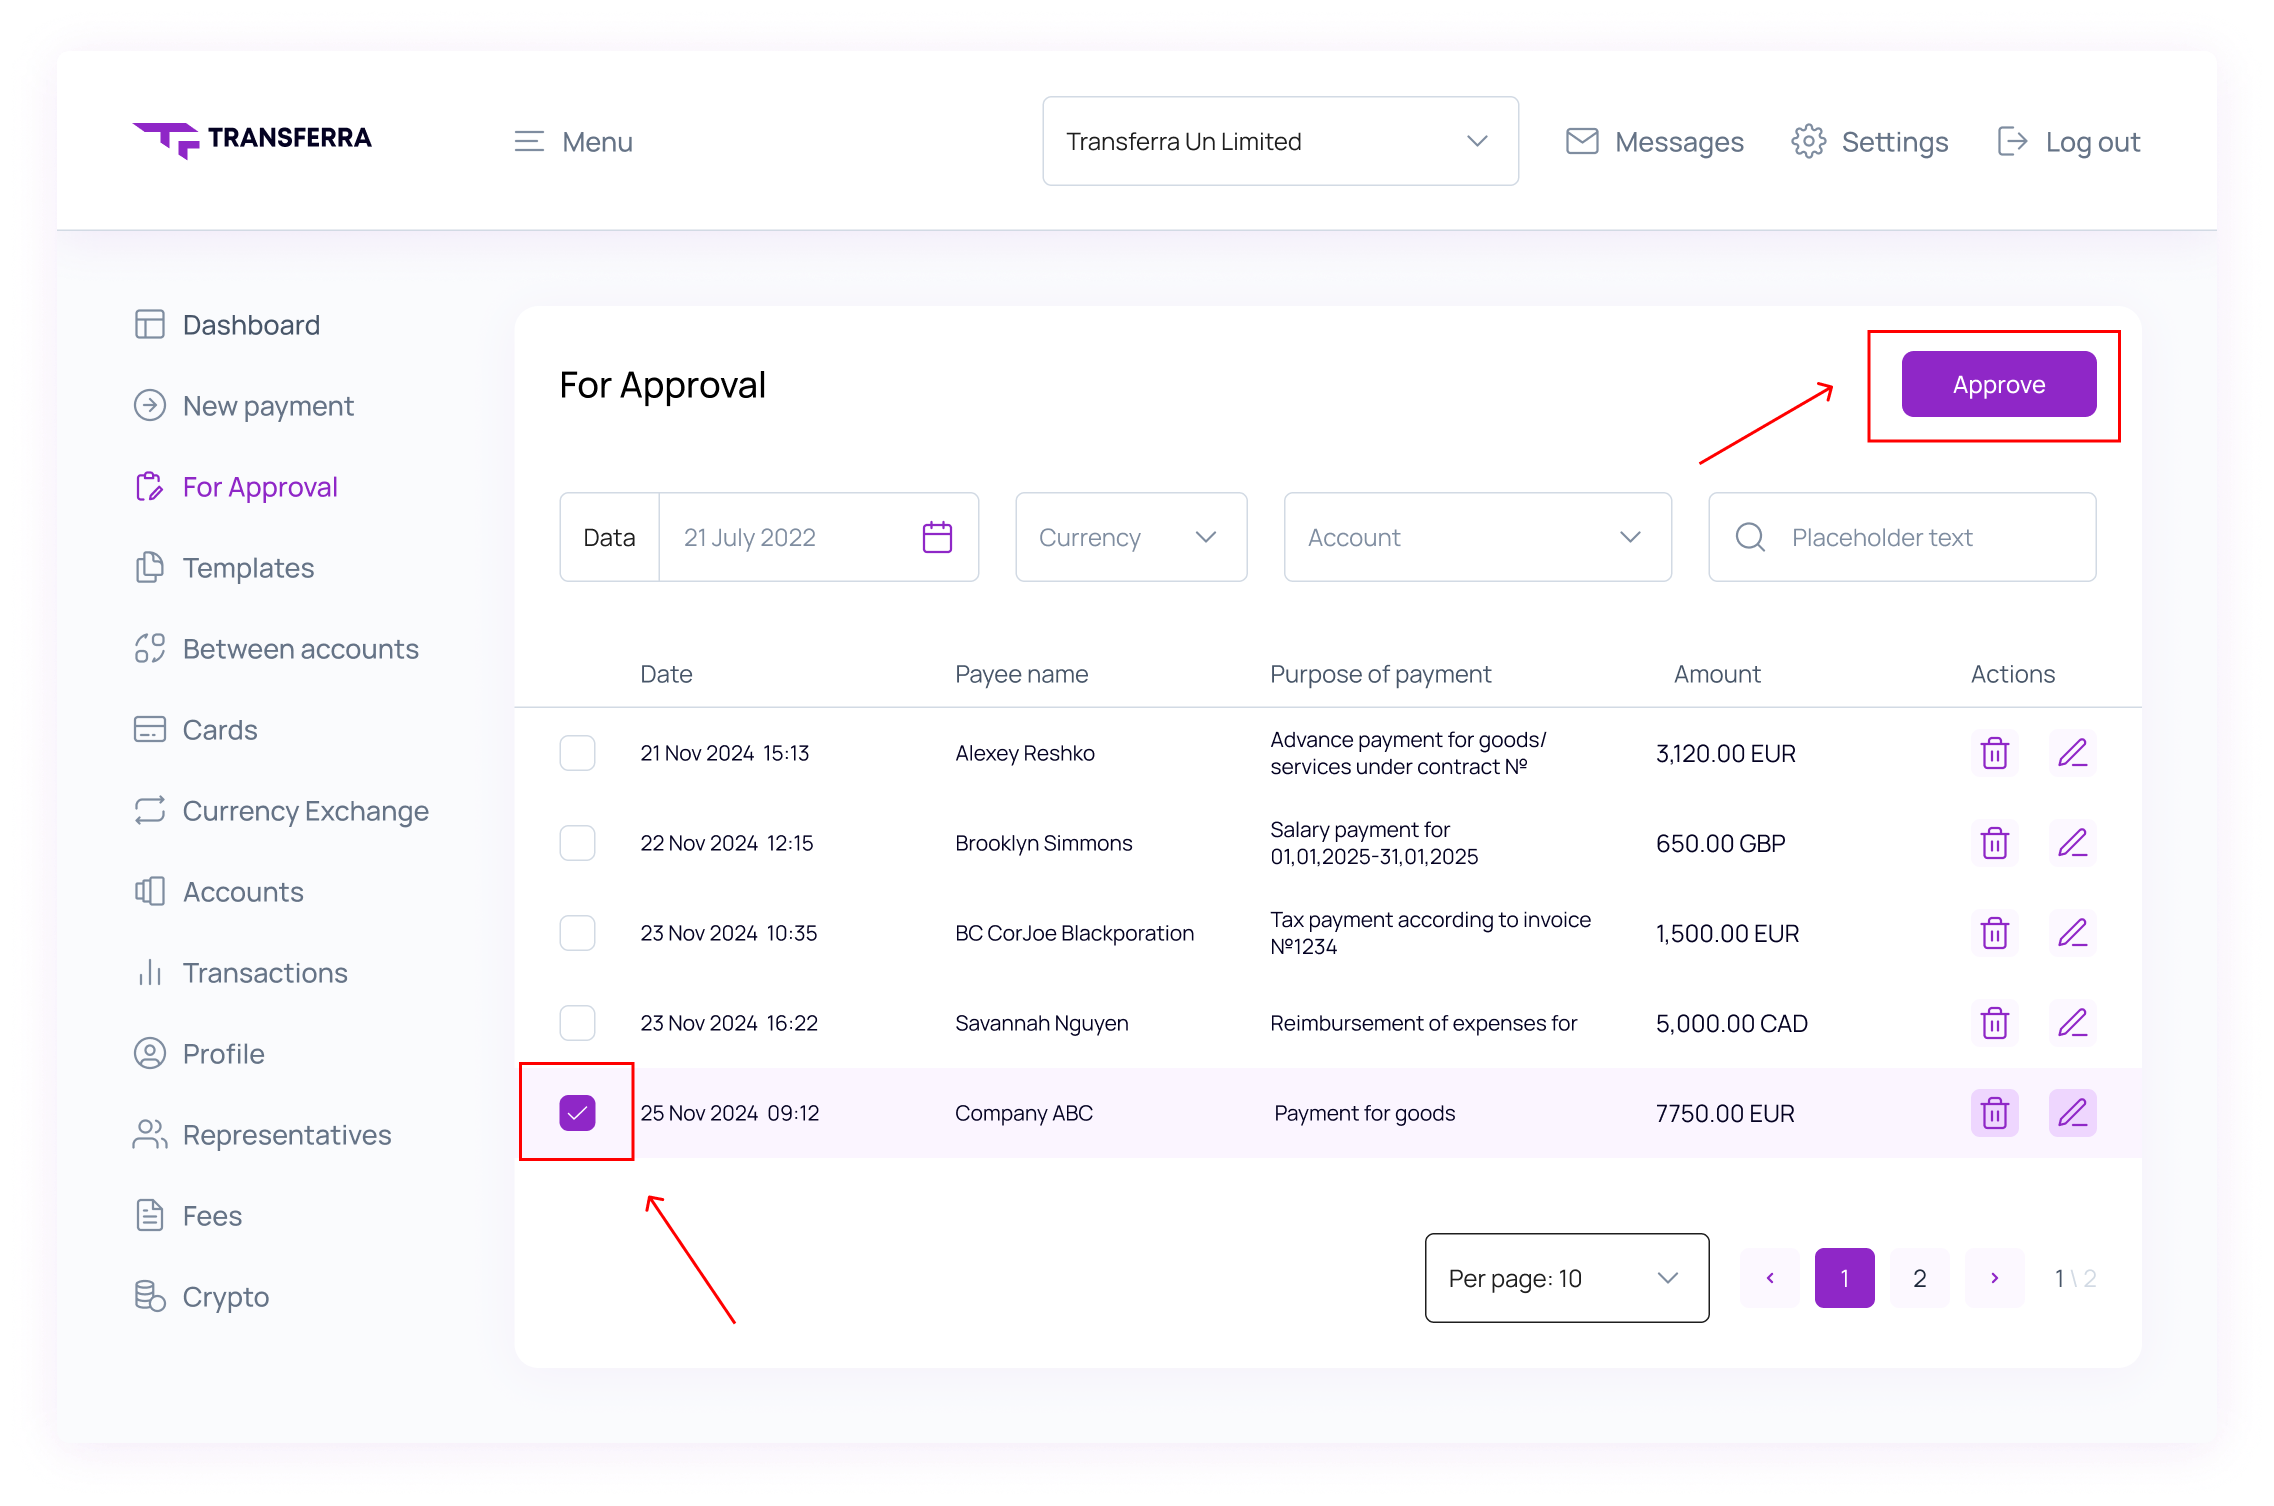
Step 4: Approve Payments
To approve a payment, check the box next to it and then click “Approve” in the top-right corner.
Step 5: Review Payment Details
Review all payment information carefully. If needed, make any necessary edits by clicking “Edit transfer”. Then proceed by clicking “Next”.
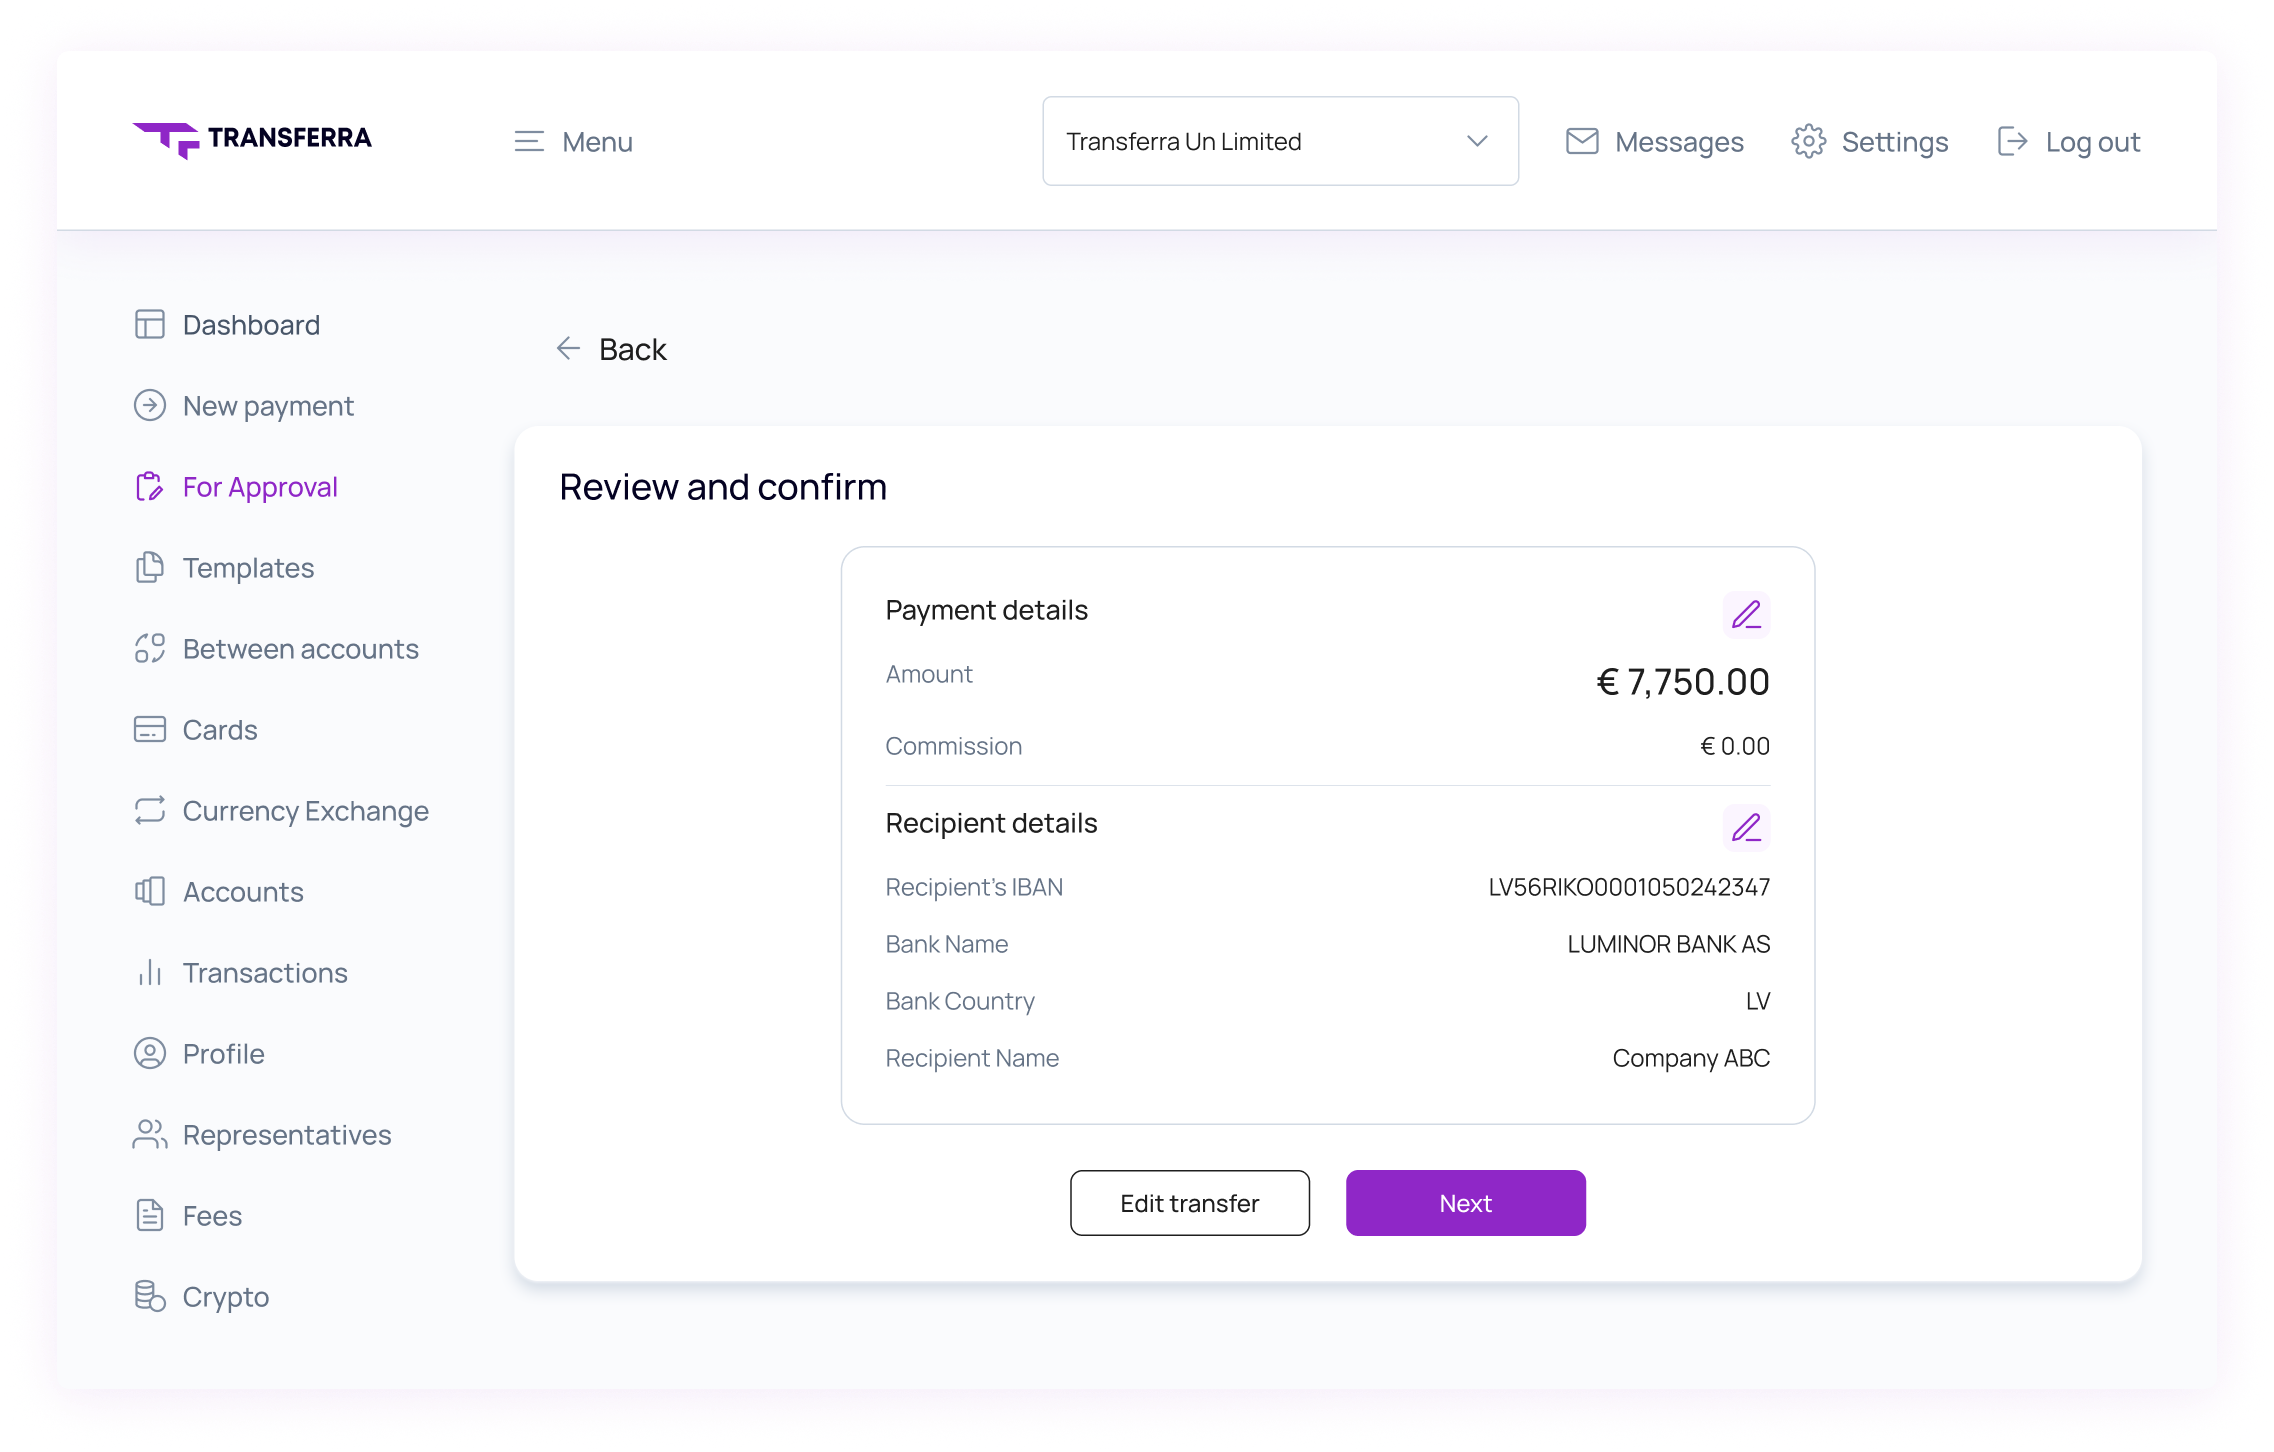
Step 6: Confirm and Send
Enter the required OTP (One-time password) code to confirm and securely send your payment.
Approve Multiple Transactions Simultaneously
You can also streamline this process by approving multiple payments simultaneously. Simply select multiple payments, review their details collectively, and confirm them with one OTP.
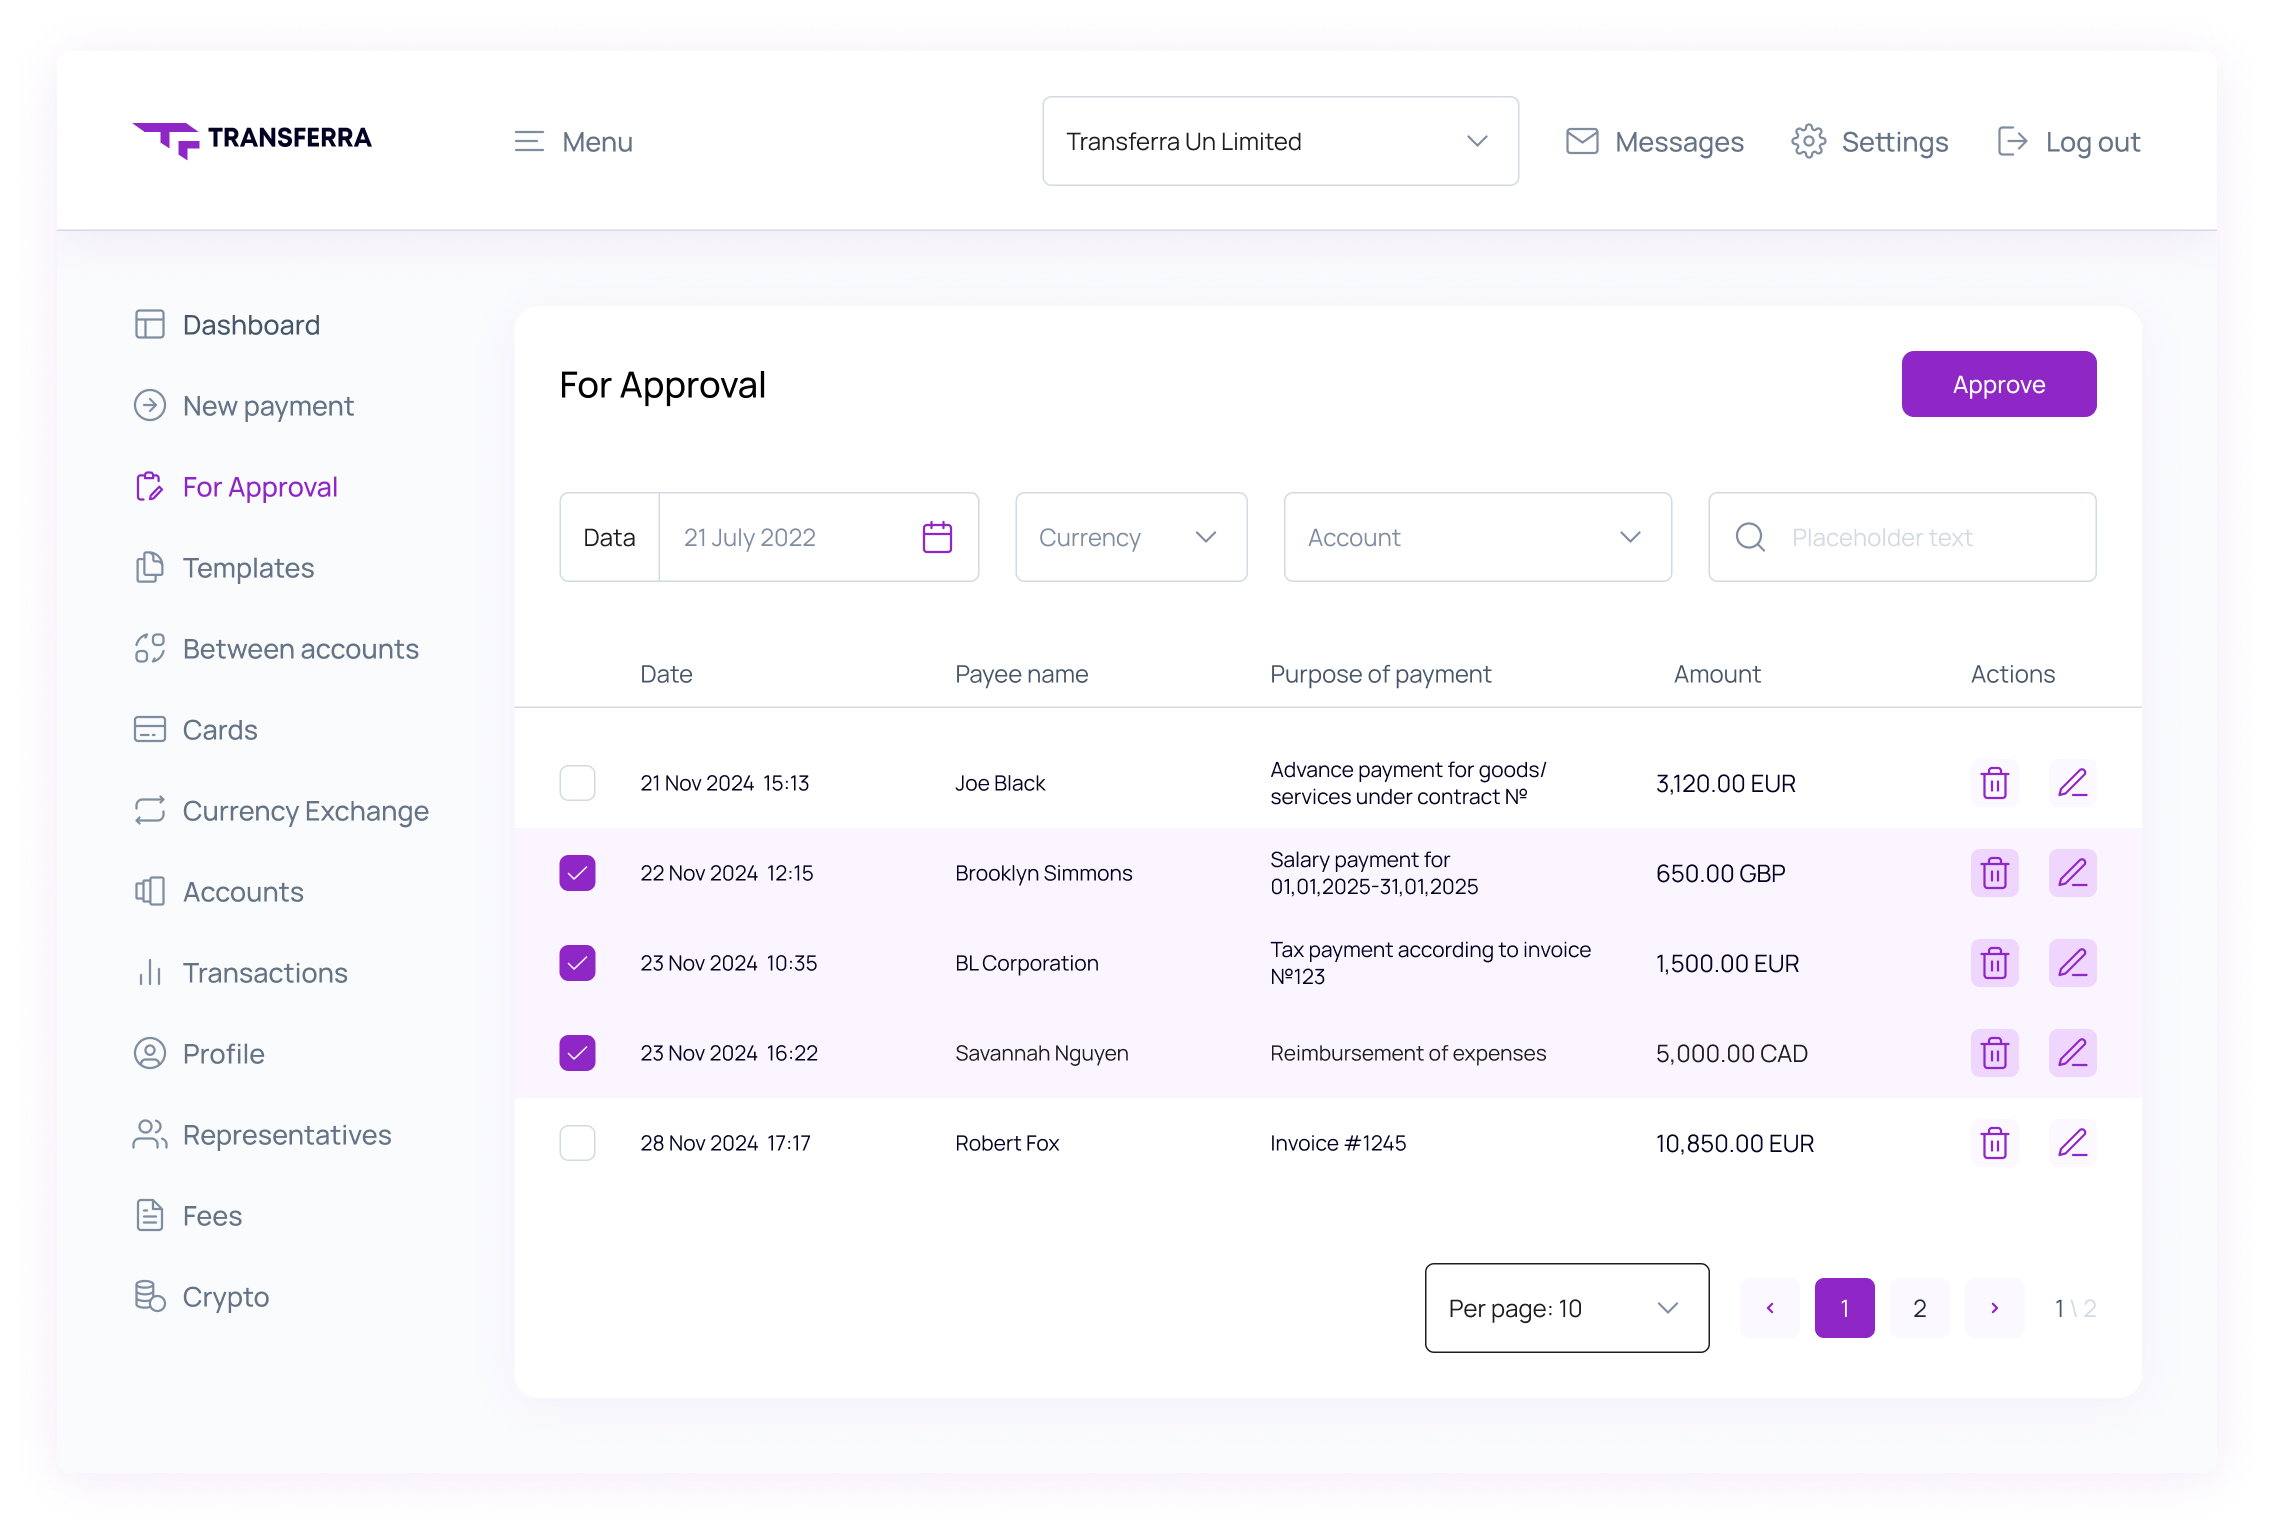
Payments saved in the approval workflow can be edited or removed, providing flexibility and control. Also, you can always find the approved payments by using filtering options.
Using Payment Templates and the Approval Workflow simplifies your financial tasks and significantly enhances your internal fund controls.
Start using these tools today and experience smoother, more convenient payment management!
If you need any assistance, please don’t hesitate to contact us.